This document presents the VRAC (Concrete Augmented Reality Visualizations) tool, how to use it, and how to install it. VRAC is an augmented reality application running on MetaQuest 3 and developed using the open-source Godot game engine. It is based on the ARwavs project previously developed by the Bivwac team: https://bivwac.fr/fr/arwavs/. The goal of VRAC is to provide a tool for creating immersive visualizations with imported datasets and 3D models. Each composition is saved in real time within the application and can be exported and shared with other users.
Project demo video:
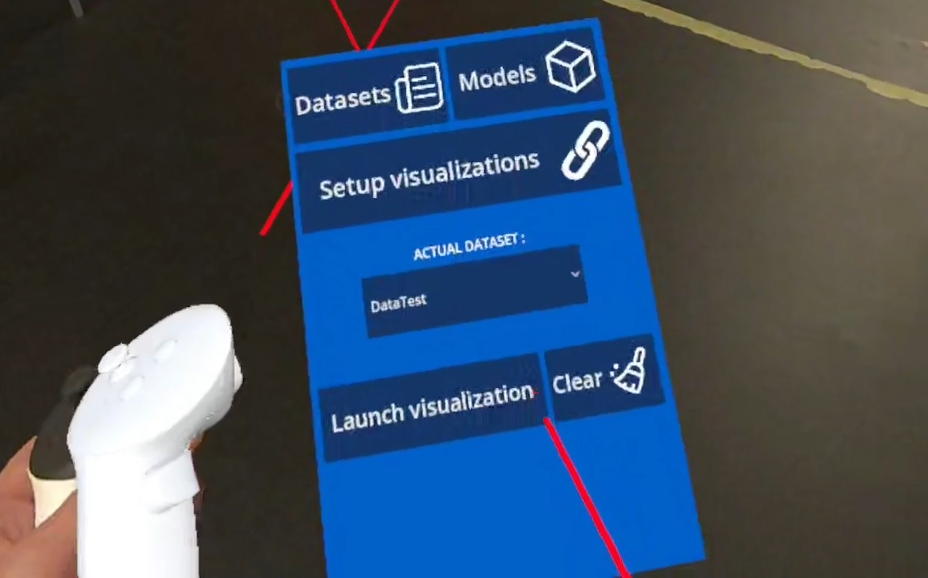
2 - Presentation :
By default, the project contains no data or visualizations. The only visible element is an interface attached to the user’s controllers.
To make it appear, the user must lift their controller and rotate it as if looking at the palm of their hand; the interface follows the last controller that performed this action.
The other controller then emits a raycast that allows interaction with the interface.
Note :
It is also possible to use the application with hand tracking. The interface will then be attached to the user’s wrist, and the user will need to touch the buttons to interact with them.
However, given the size of some buttons and settings, it is recommended to use controllers.
2.1 - Import files
Initially, the user must import the datasets and 3D models they want to use.
Import a dataset:
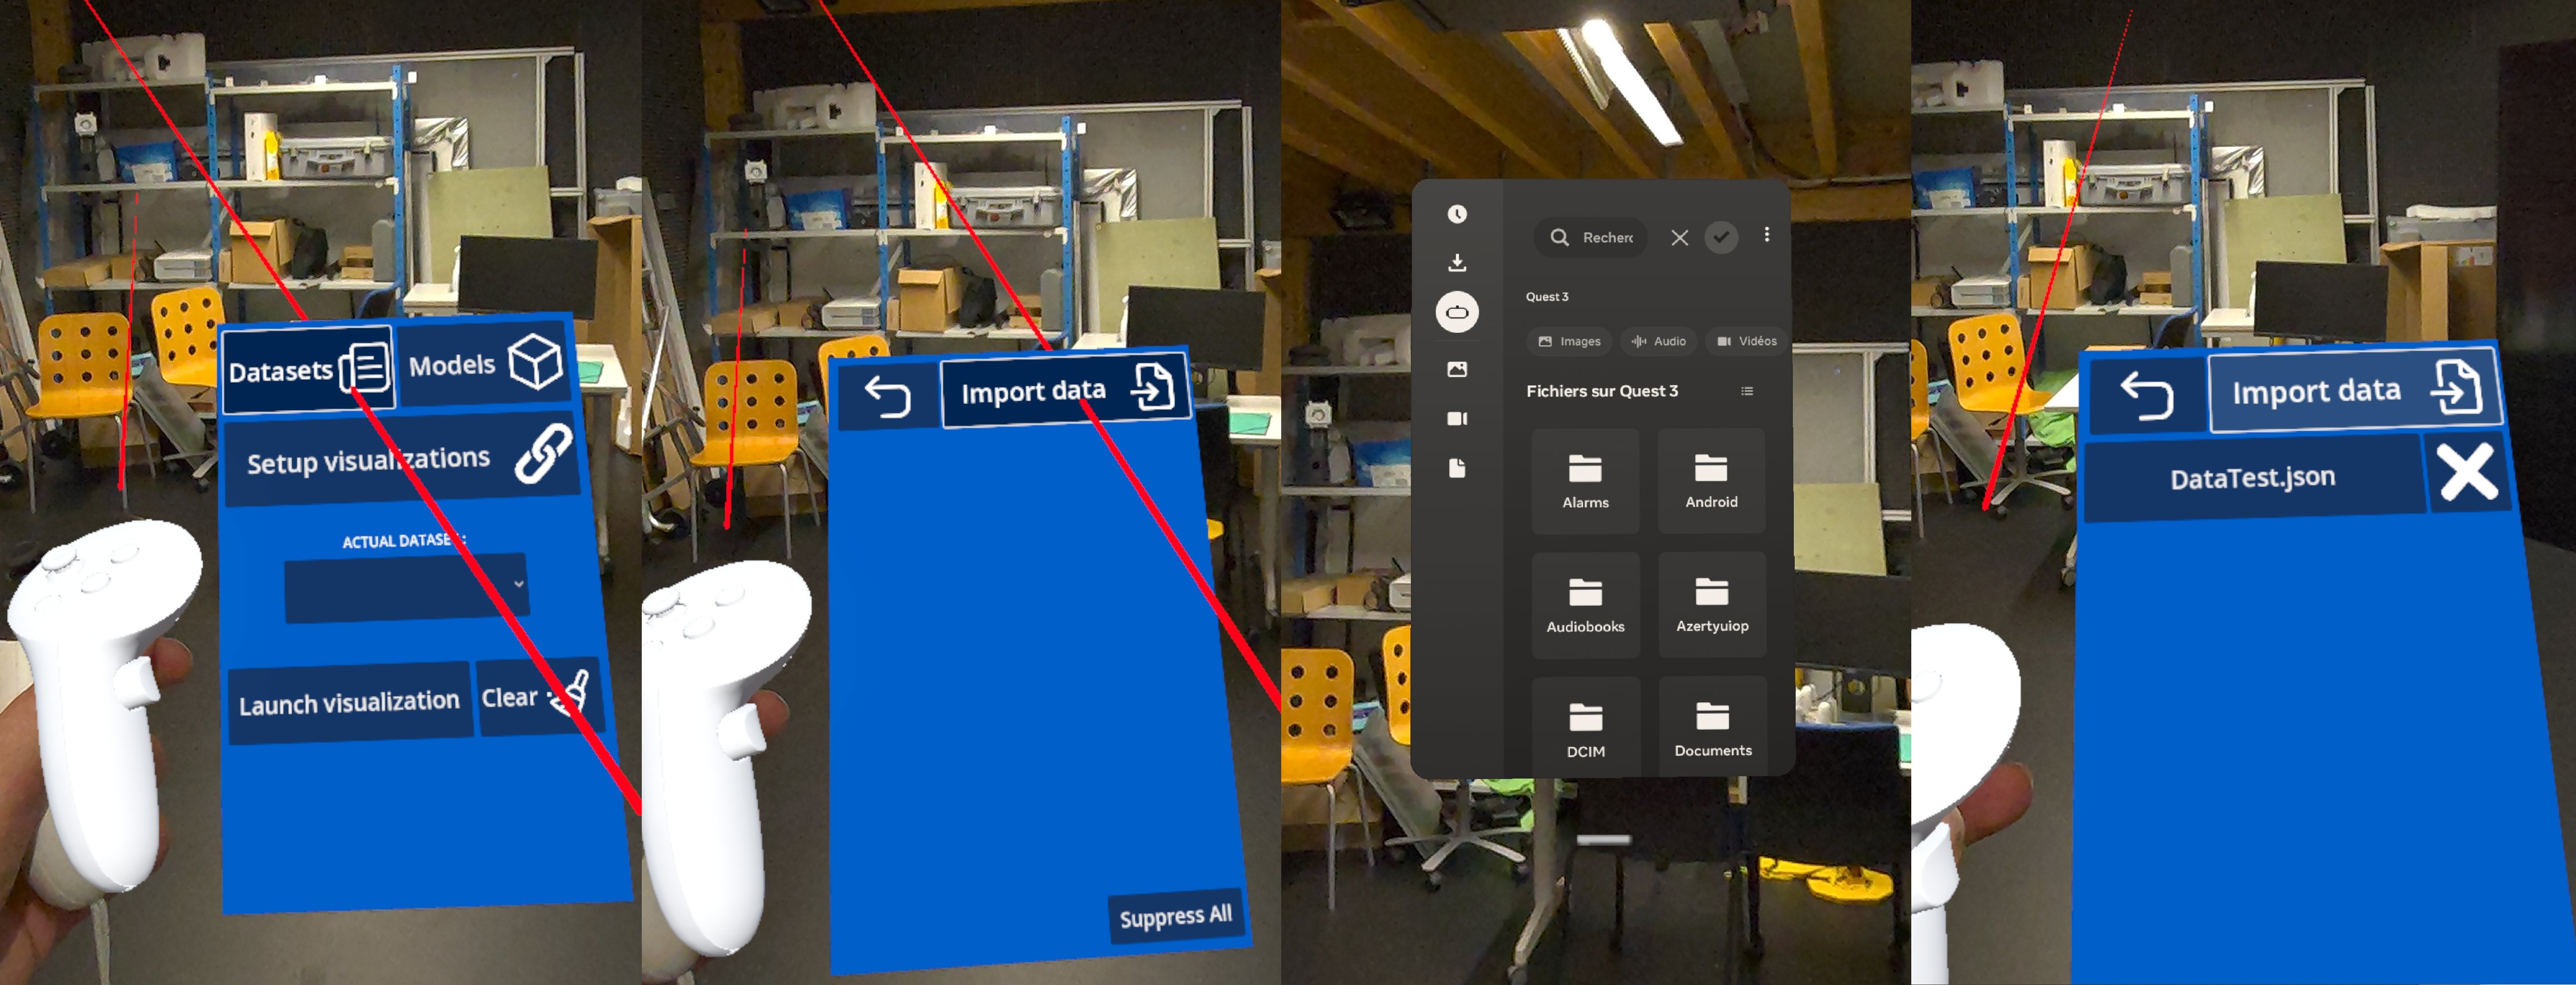
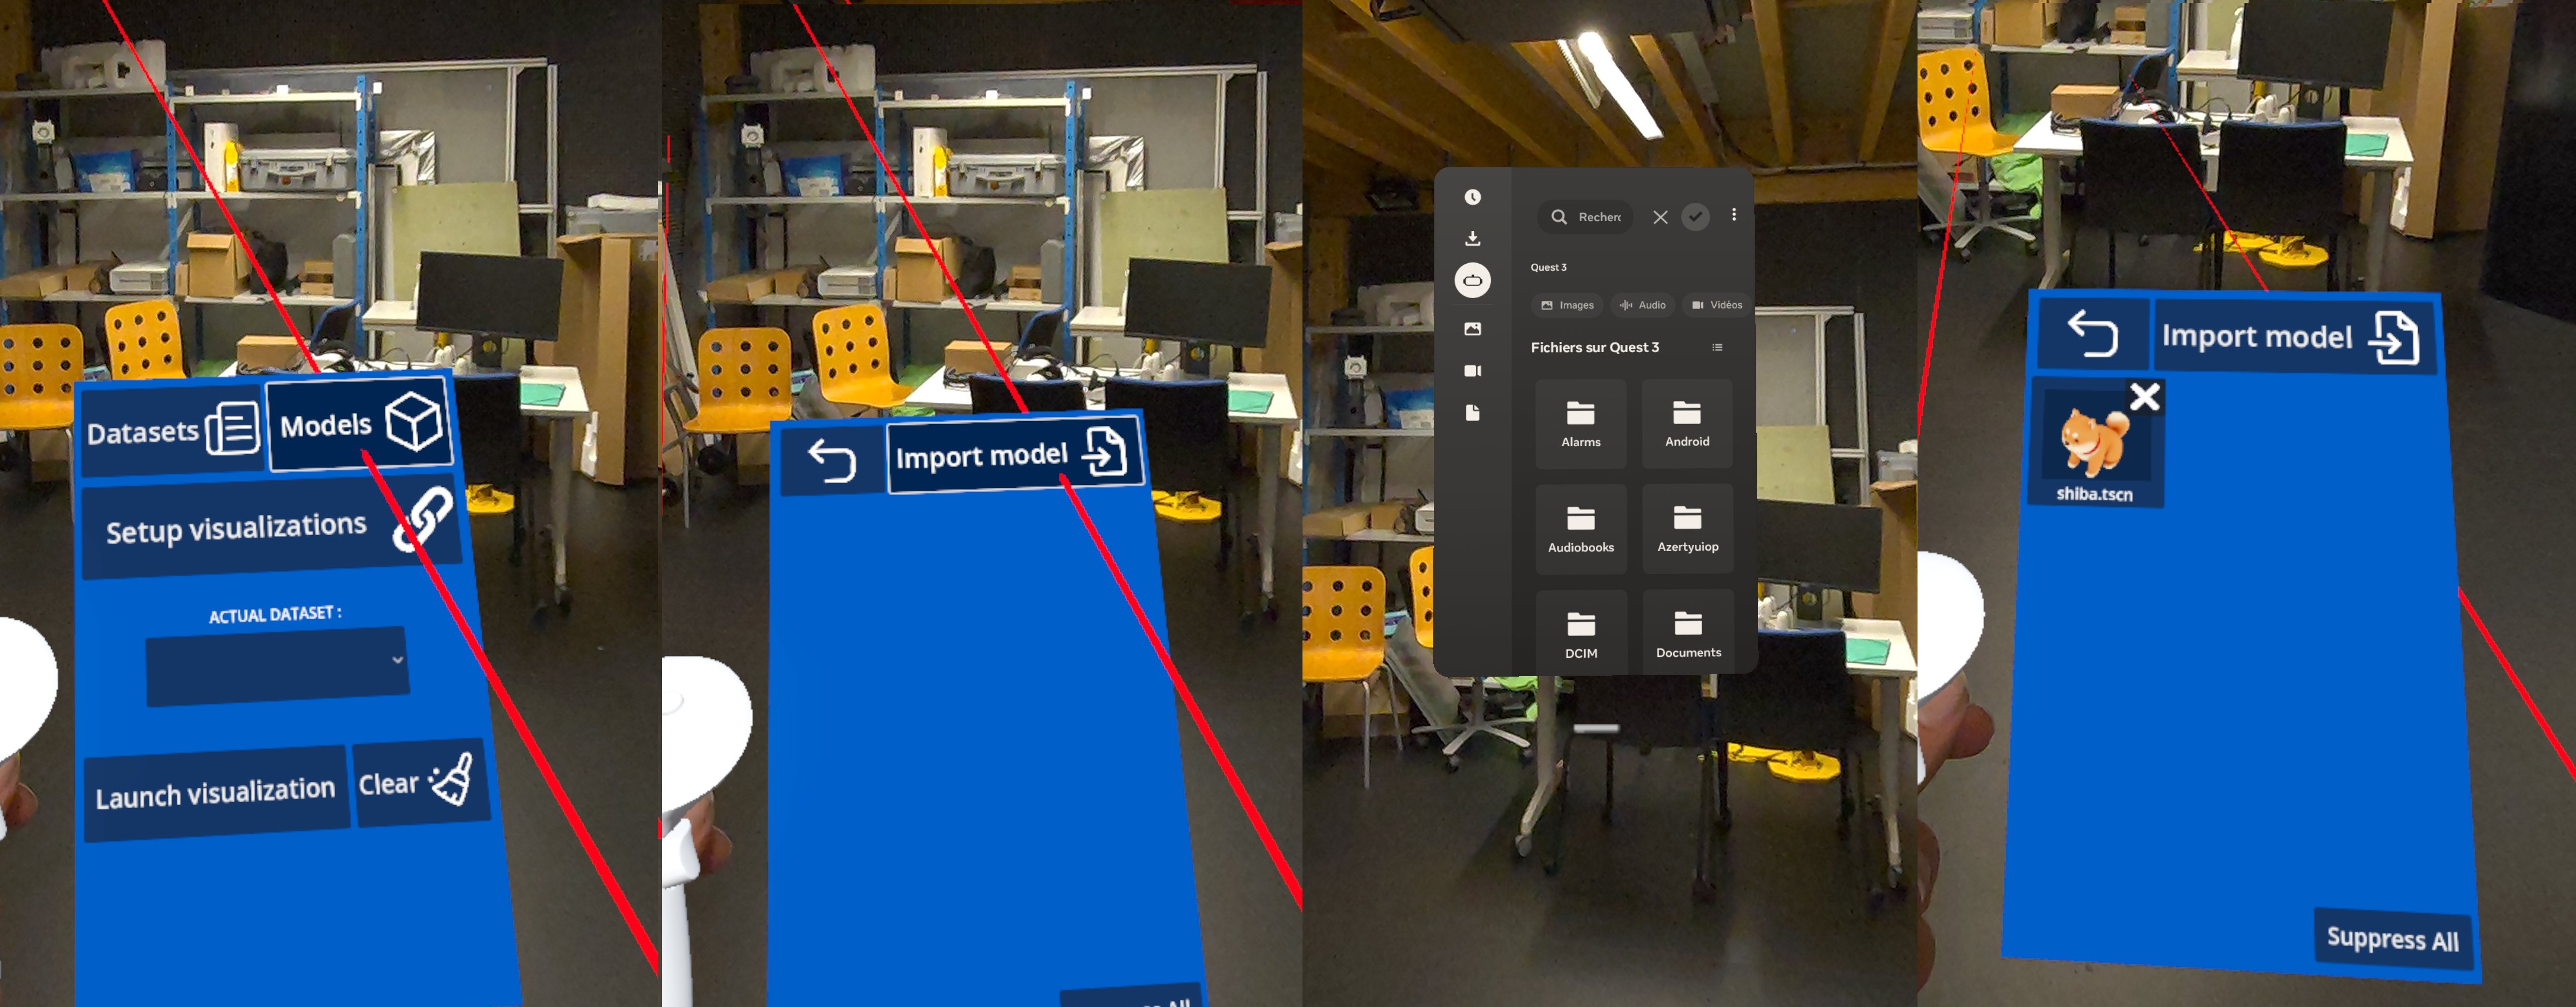
Click the “Datasets” button to open the dataset management menu.
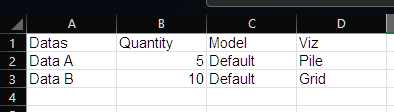
The “Import Data” button opens your headset’s native file management menu. You can then select a .csv file. VRAC requires datasets with a specific format:
First column: Data name
Second column: Value
We will use the following “DataTest.csv” dataset as an example:
Note :
The “Model” and “Viz” parameters are optional. They allow you to reference the name of a 3D model already imported into the application and assign a visualization at the import.
You can leave them empty. Assigning 3D models and visualizations will be explained later in this documentation.
Once your data is imported, you can find it in the application’s dataset list. We’ll come back to this after importing the 3D models.
These datas have been saved and can be deleted at any time using the “X” button to their right or the “Clear All” option.
Import a 3D model:
Click the “Models” button to open the 3D model management menu.
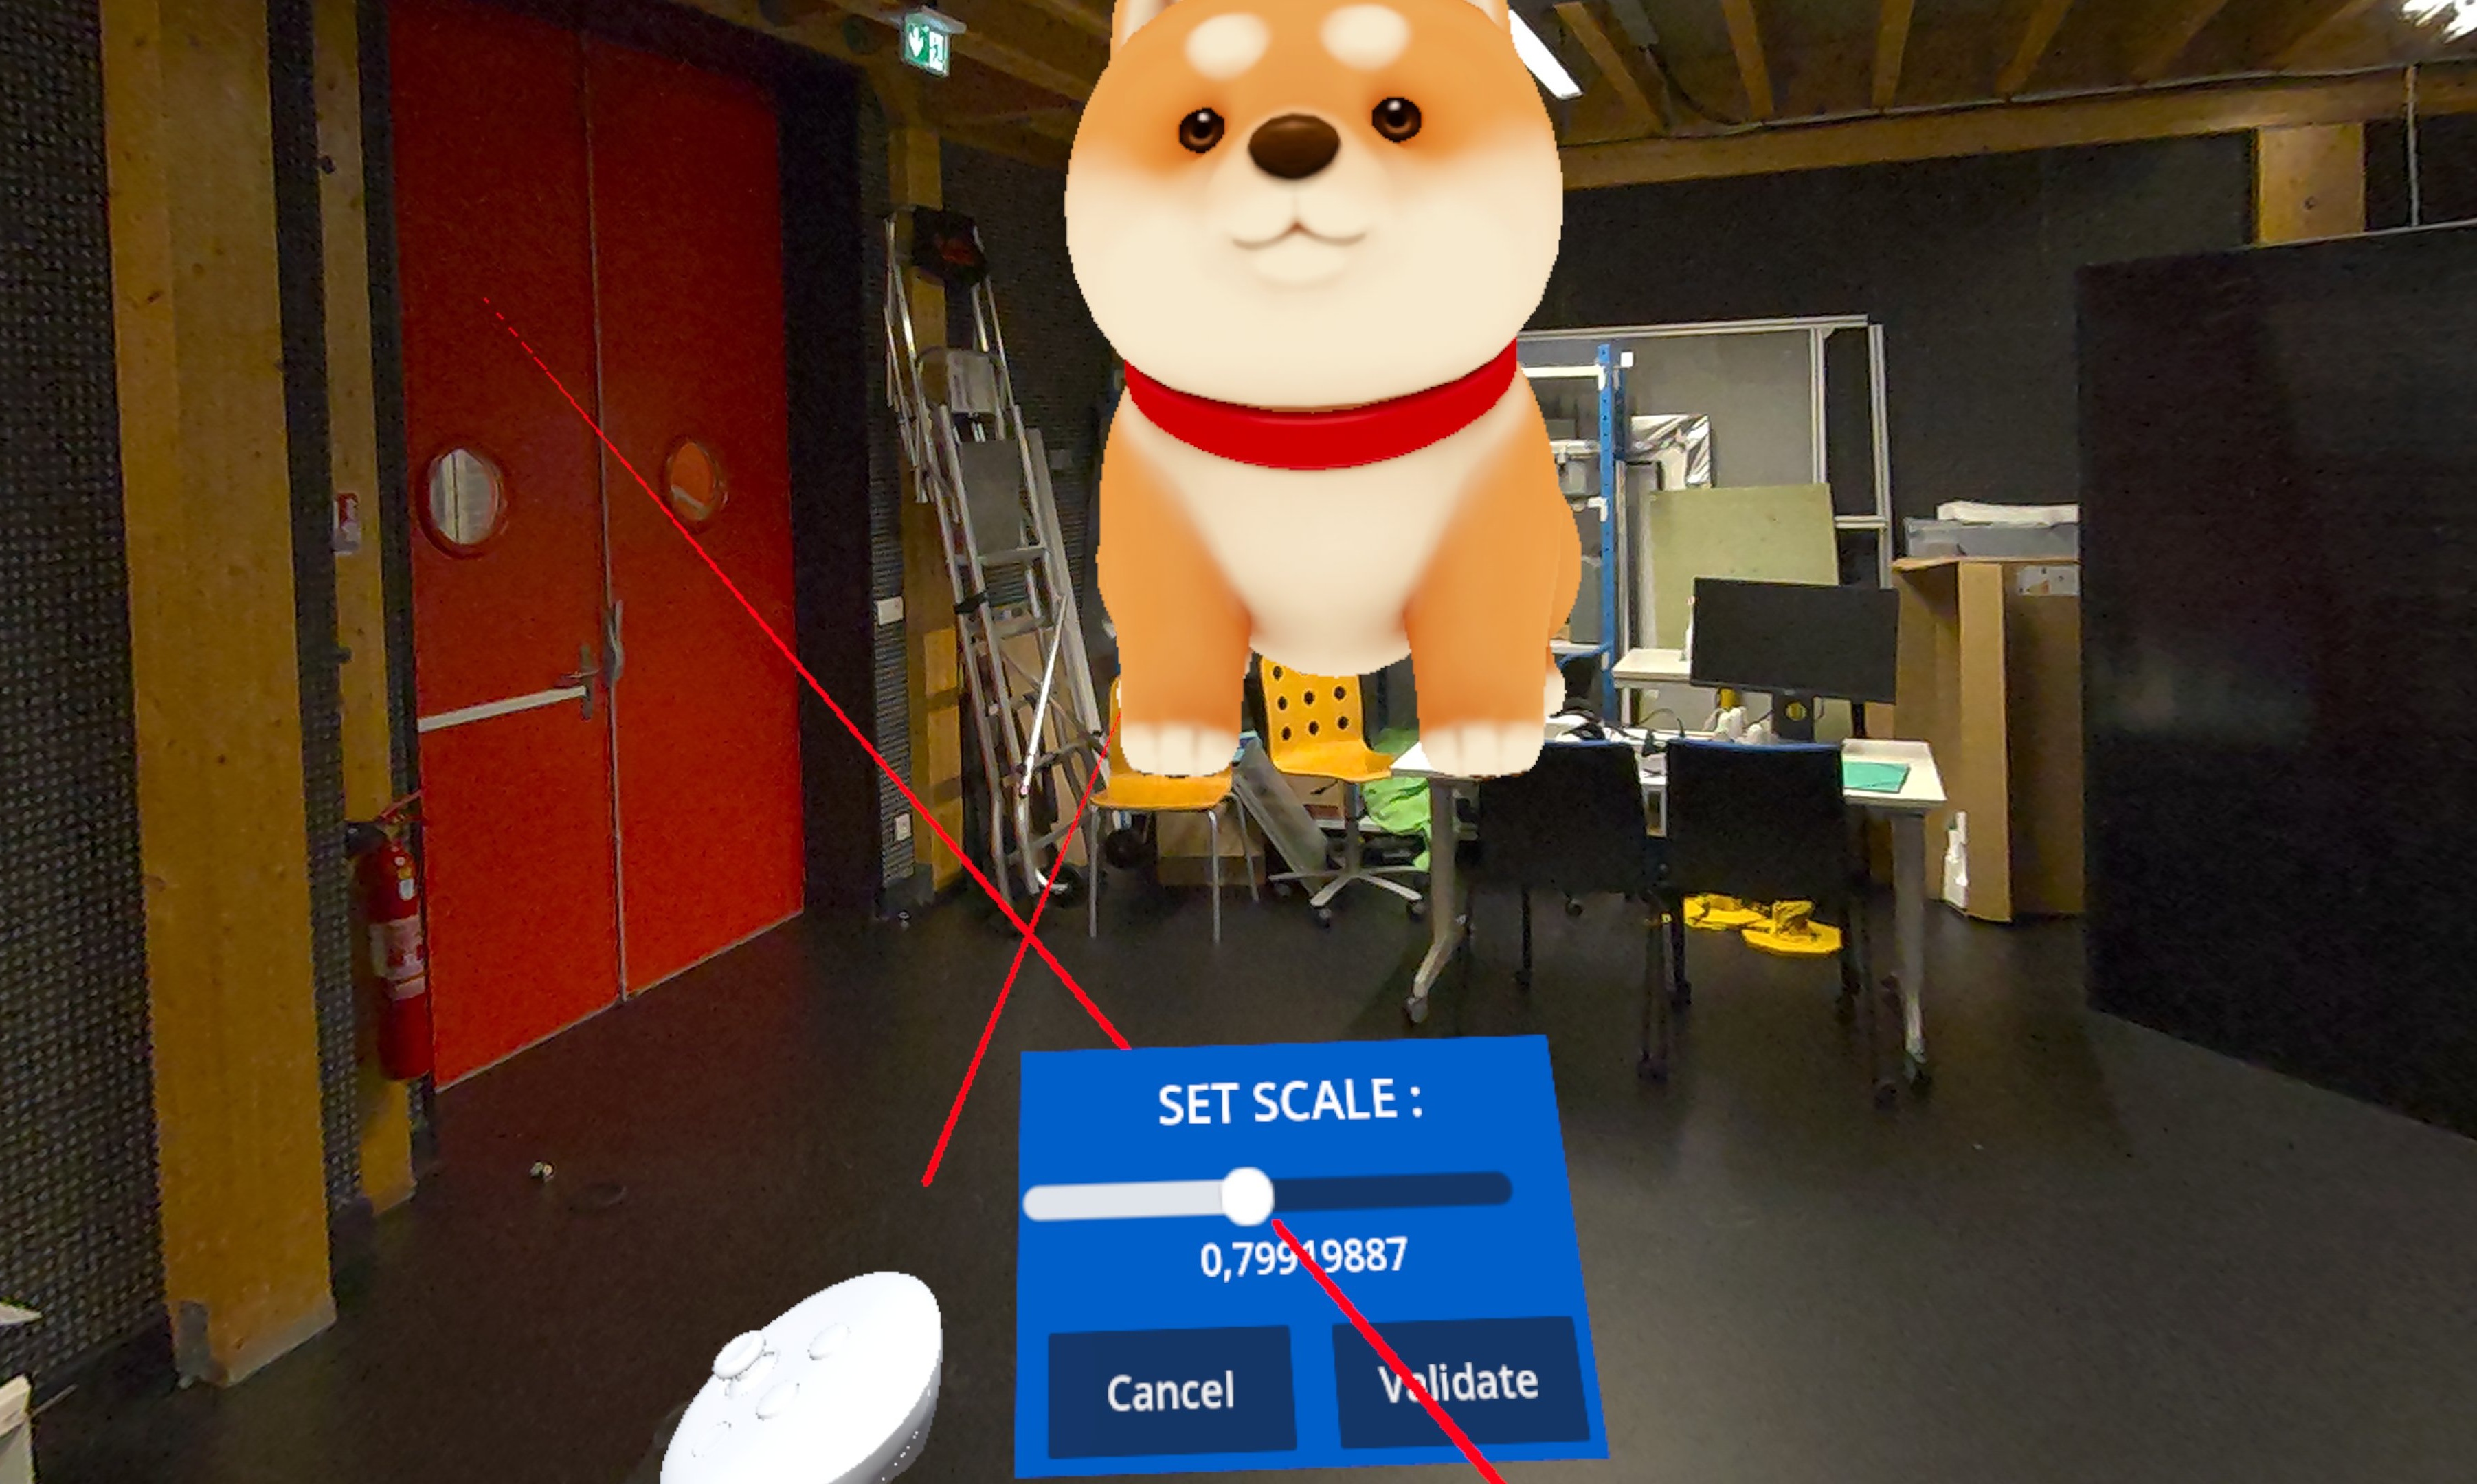
Similar to datasets, the “Import Model” button opens the headset’s native file management menu. Compatible models are .glf and .gltf files.
Once your model is imported, it will appear with an interface allowing you to define at which size you want to save it.
The model is then accessible in preview, accompanied by a “X” button to delete it if necessary.
2.2 - Create visualizations
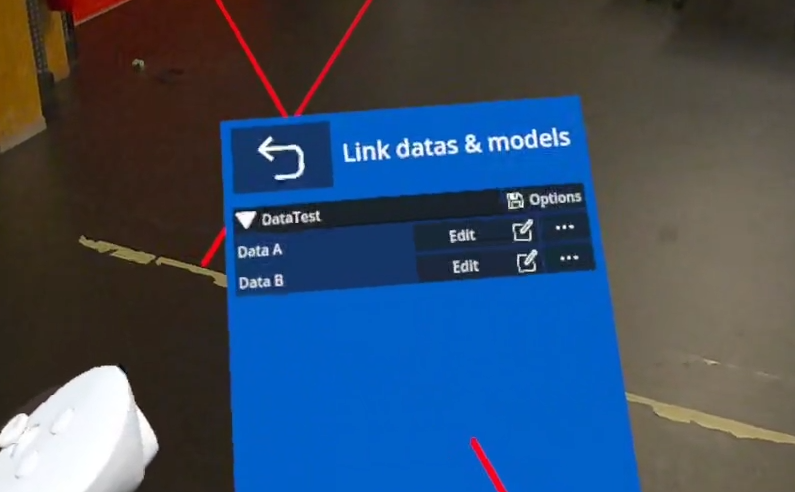
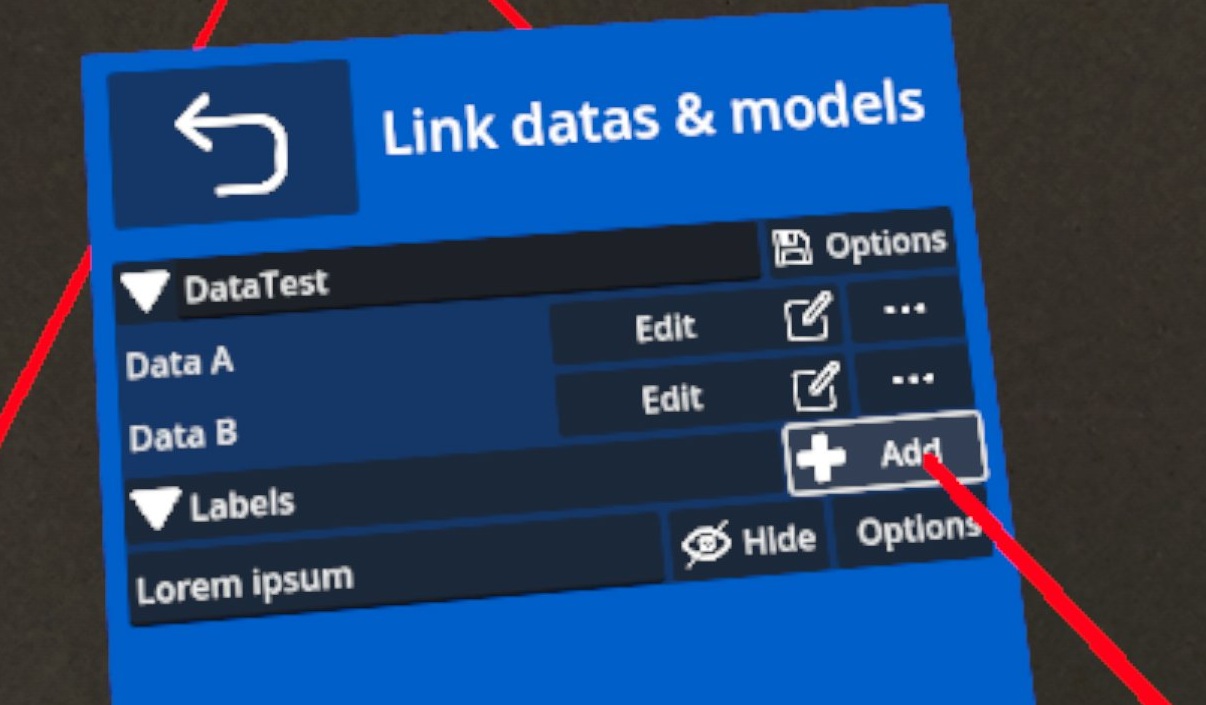
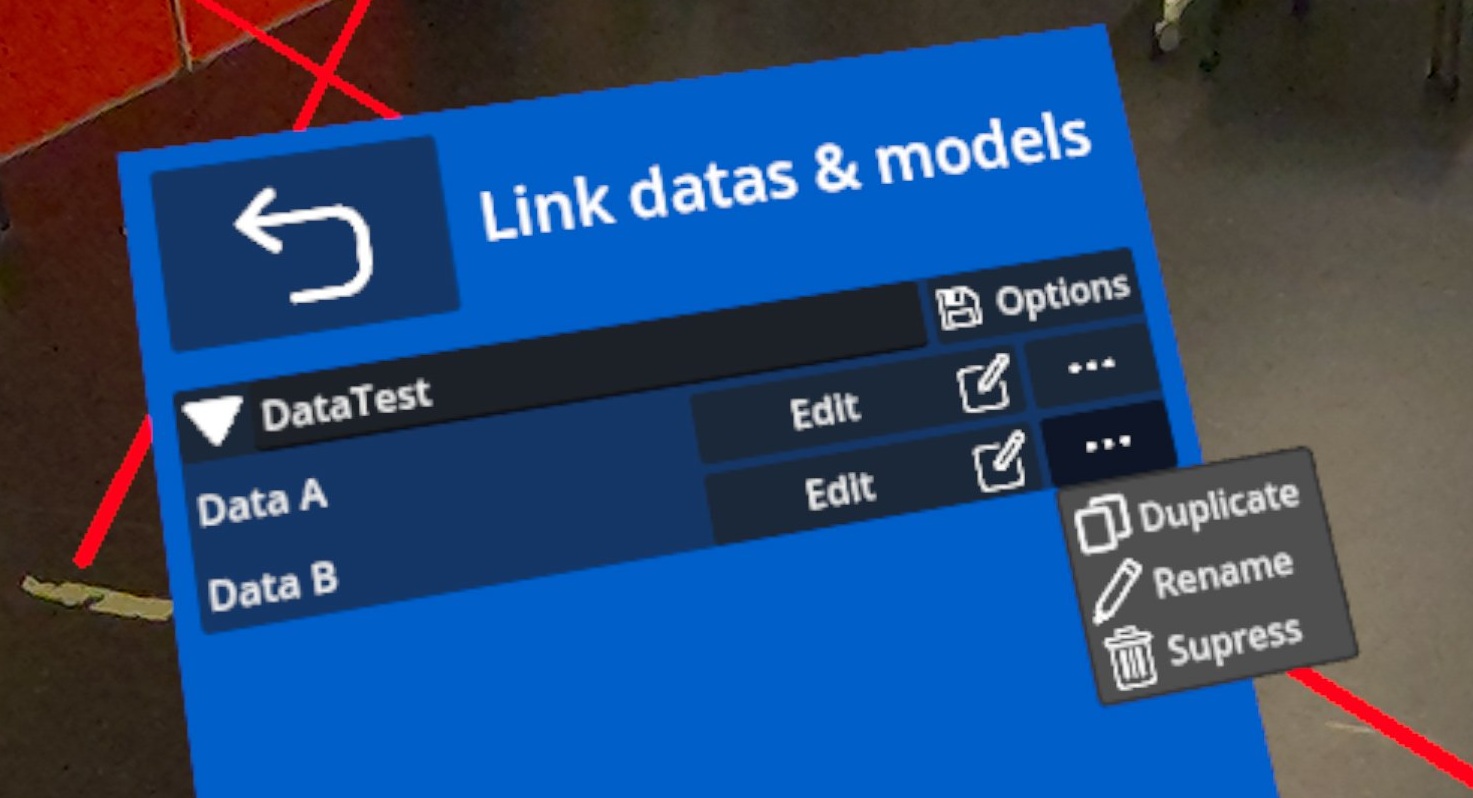
Now that your application contains your datasets and 3D models, you can use them to create visualizations by going to the “Setup Visualizations” menu.
This menu contains the dataset “DataTest” created from our dataset. This dataset contain two datas “Data A” and “Data B”.
We will associate visualizations with these datas.
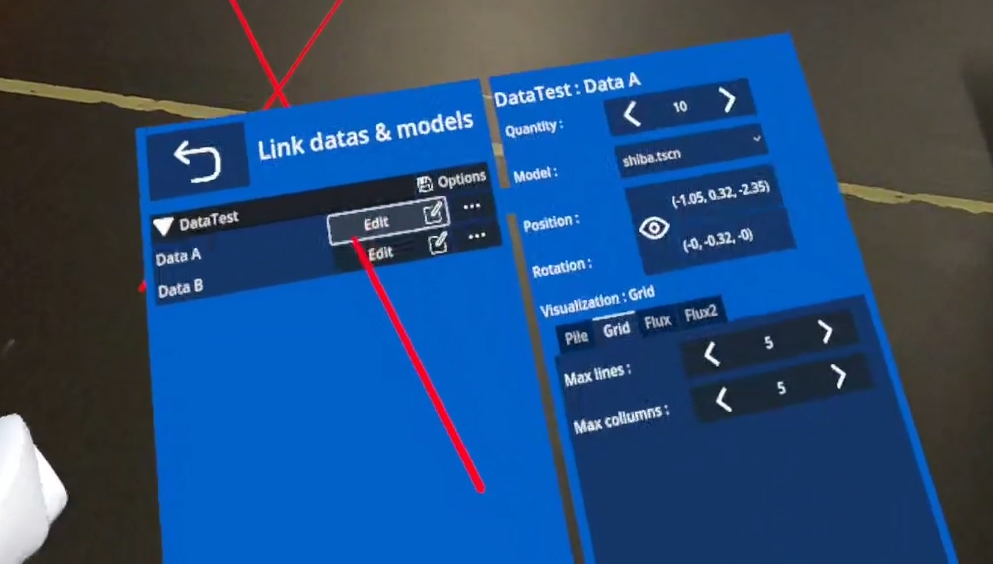
To do this, click the “Edit” button on the row of a data (e.g., Data A).
A second panel will open containing information about that data.
We have:
Quantity :
The quantity defined in our dataset.
Model :
The 3D model we will use.
Position & Rotation :
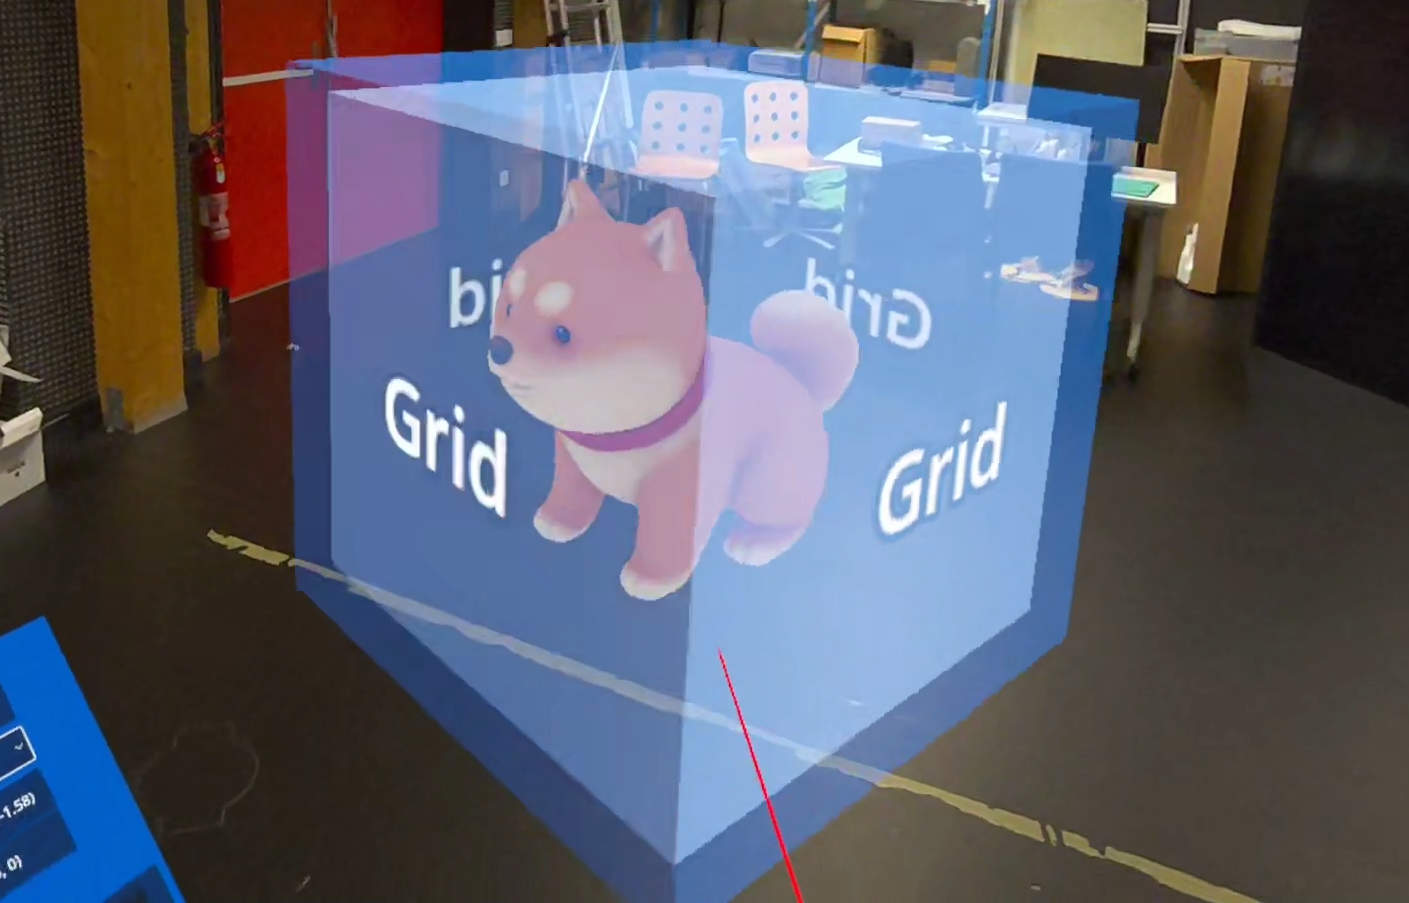
Opening this panel displays a cube containing your 3D model. This cube defines the position in space where your visualization will be instantiated and its orientation.
You can grab this cube with your controller’s raycast, move it forward/backward using the up/down joystick, and rotate it using the left/right directions.
Visualization :
Define the type of visualization you will use. Each has its own parameters.
The existing visualizations are as follows:
Single :
Place the object in the scene at the indicated location. This is primarily an option for dressing up the scene. For example, with a table on which to place your other visualizations.
Parameter :
Collision : Whether the object should react to contact with other visualizations.
Fixed : Whether the object should be subject to gravity.
Interactable : Whether the object can be manipulated by the user.
Pile :
Drops items onto a given point; their fall and collisions pile them up into a stack.
Parameter:
Frequency : Number of items per second.
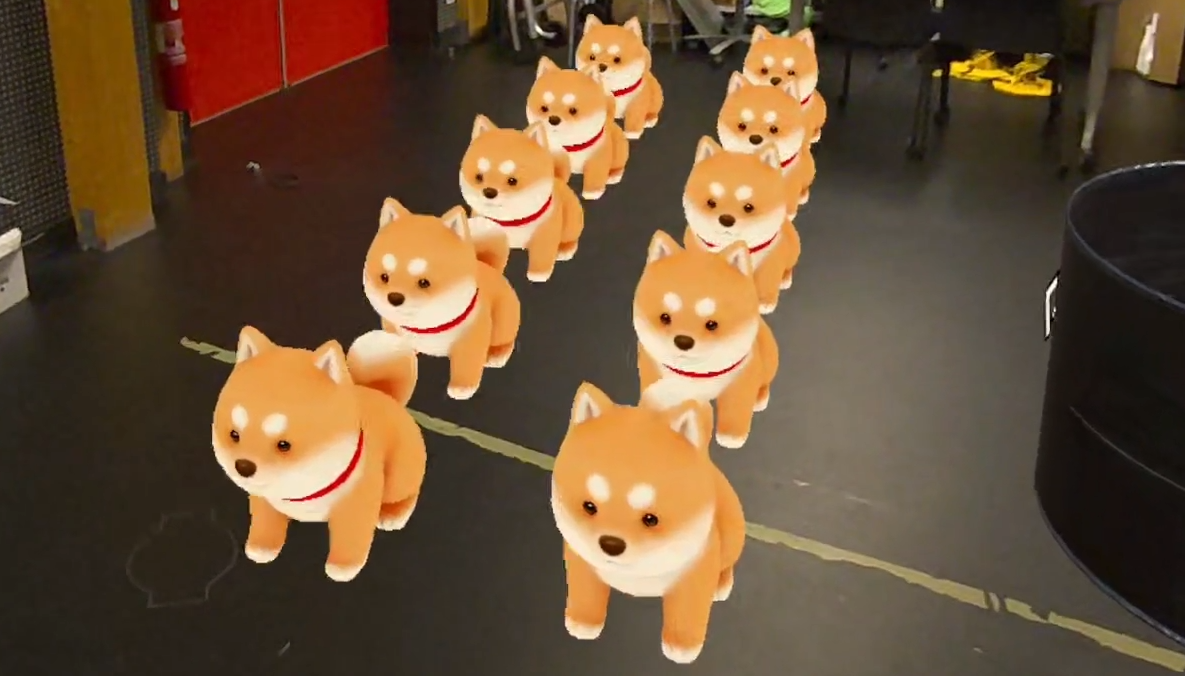
Grid :
Distributes the items evenly in a grid.
Parameters:
Max lines : Maximum number of lines.
Max collumns : Maximum number of columns
Collision, Fixed & Interactable just like Single visualization.
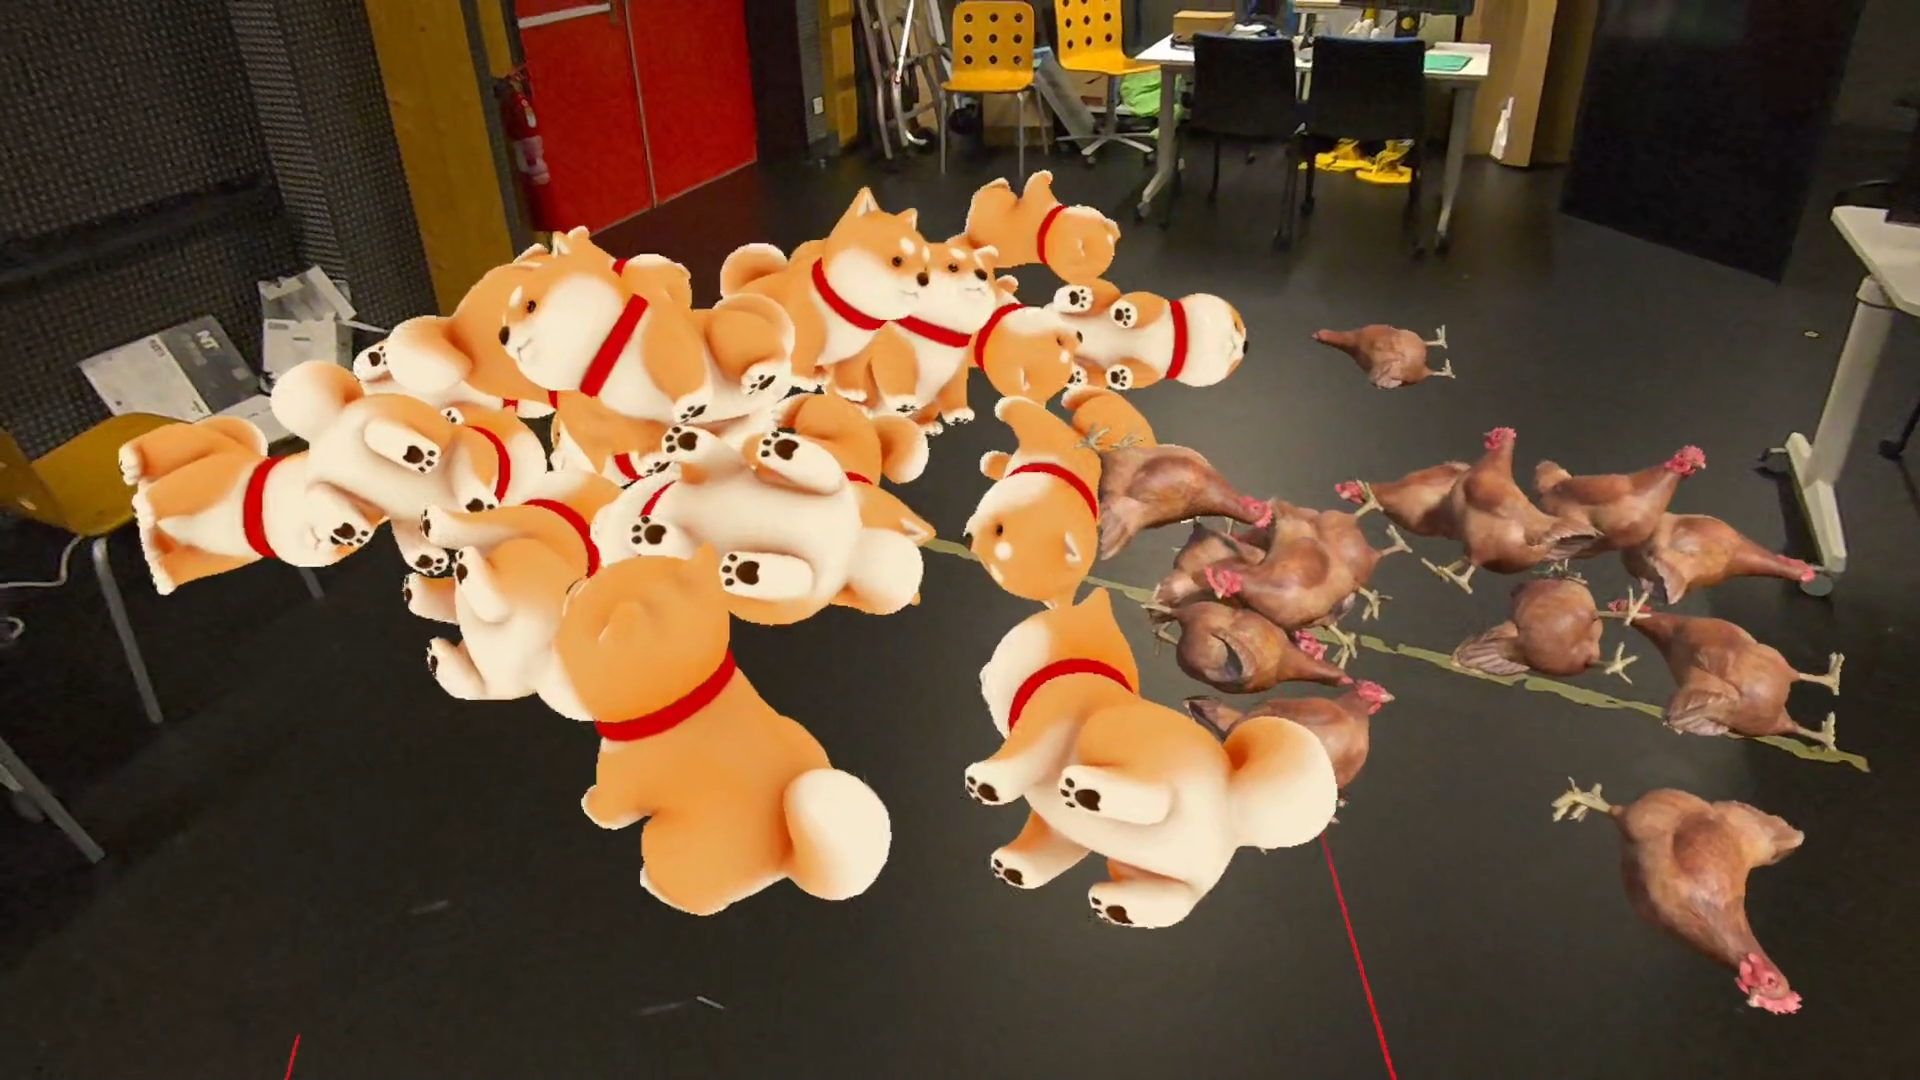
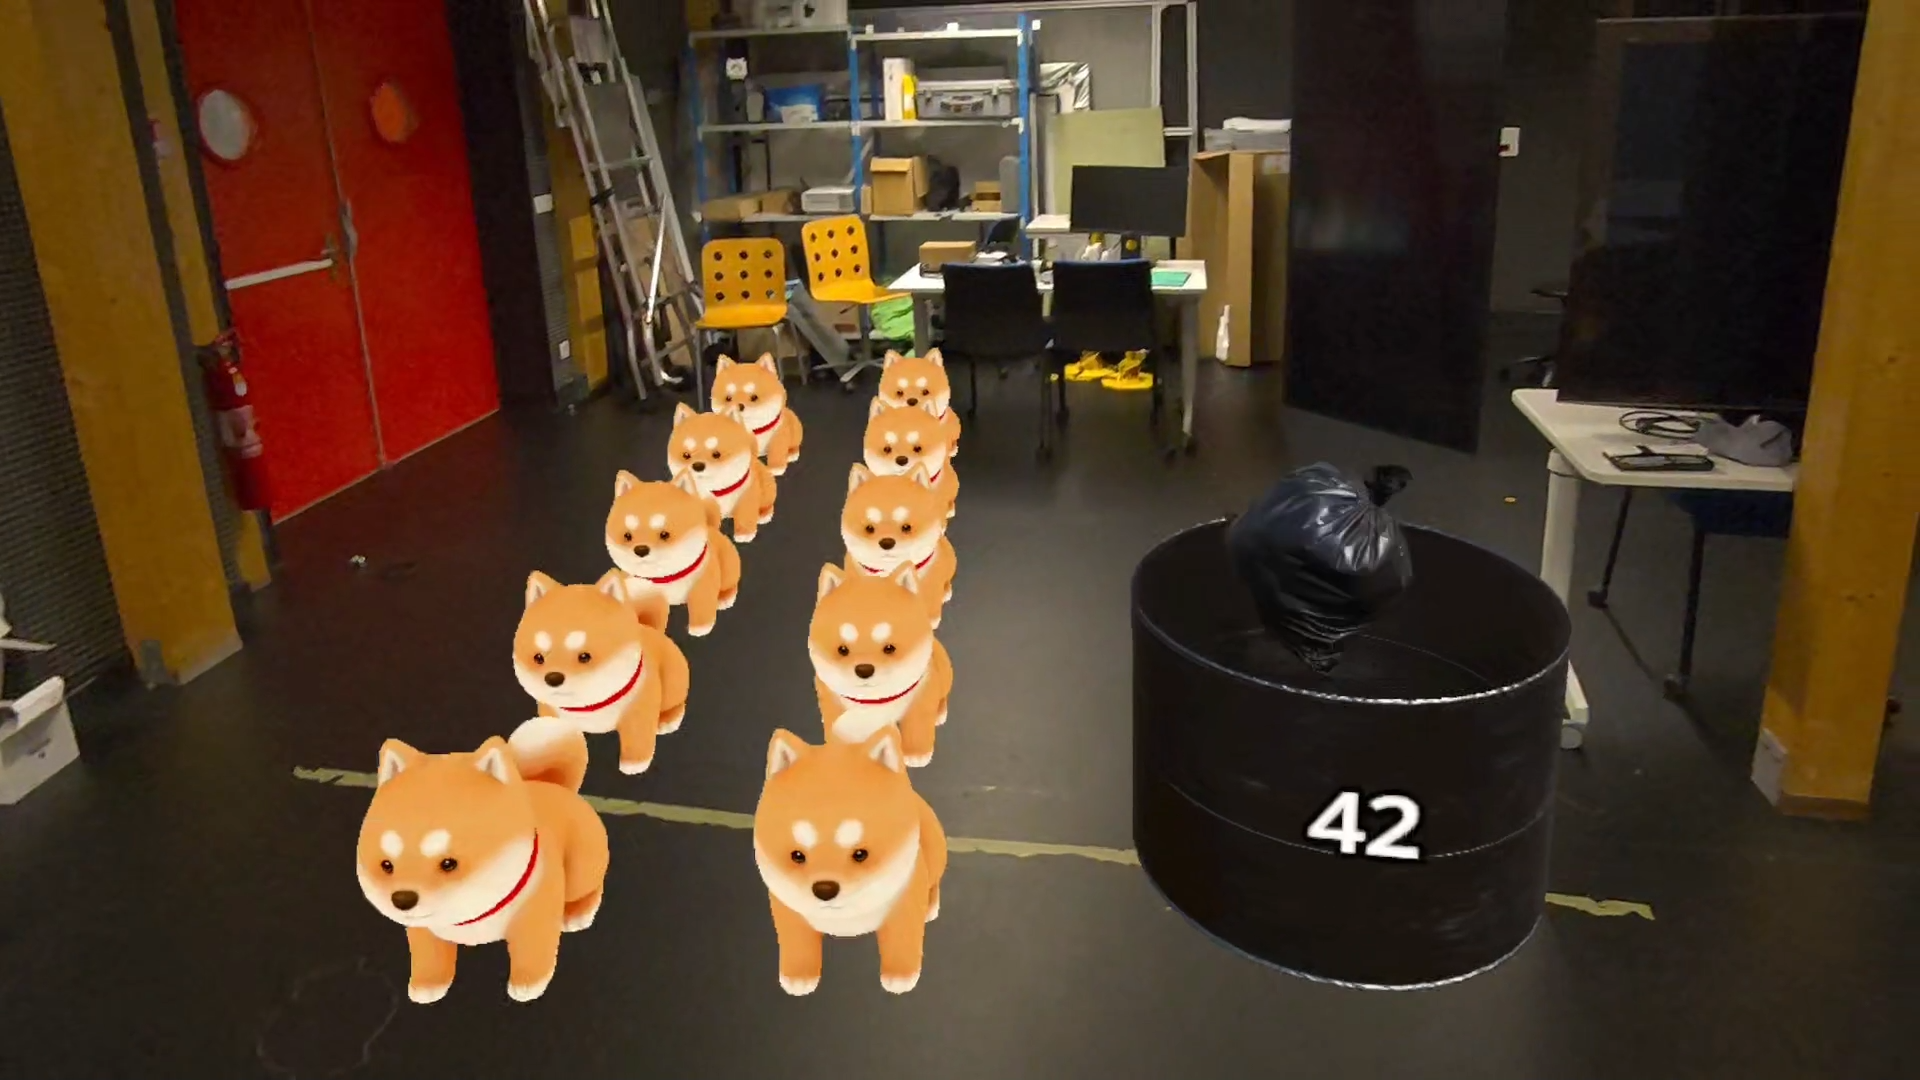
Flux :
Generates an infinite number of items falling from one pipe to another, each item disappearing once in the second pipe. A counter on the lower pipe increments with each item.
Parameter:
Frequency : Number of items per second.
Note :
Each modified setting is saved instantly.
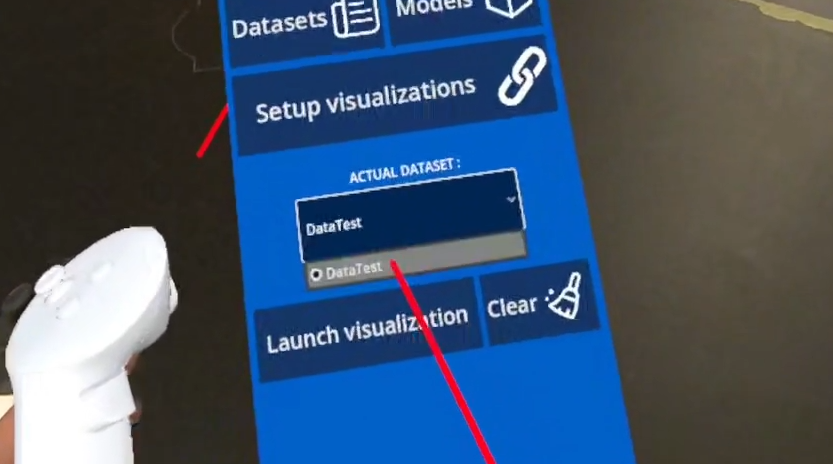
Once you have defined the parameters for each of your datas, you can return to the main menu.
You can then select the dataset you wish to view (in our case, DataTest) using the “Actual Dataset” button.
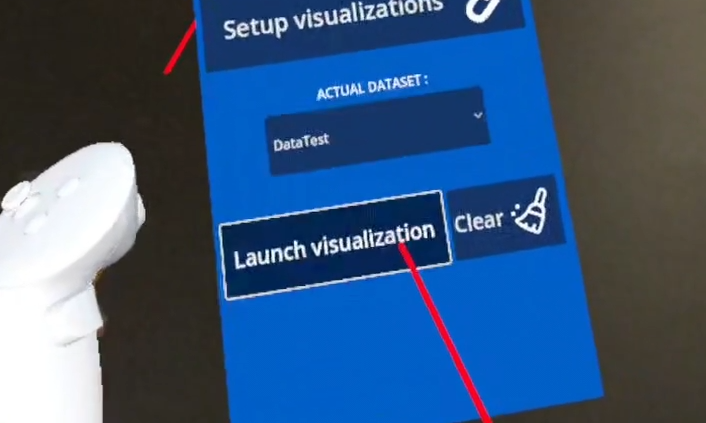
Next, click “Launch Visualization”. Each visualization in your dataset will appear at the location where you defined its instantiation point.
You can clear the scene at any time using the “Clear” button, or launch a new visualization using “Launch Visualization” again.
In our example, the generated scene then corresponds to a grid visualization and a second one in flux in front of the user.
2.3 - Créer des panneaux
In VRAC, you can also create panels to write information about your visualizations. These panels can be placed anywhere in the scene and are saved with your visualizations.
To create a panel, click the “Add” button in the bottom right corner of your dataset.
A new panel is created, you can edit its text, hide it, delete it, or duplicate it using the options in your interface.
You can also grab the blue sphere below it with your controller to move it around. Its position and rotation are saved in real time.
2.4 - Export your data
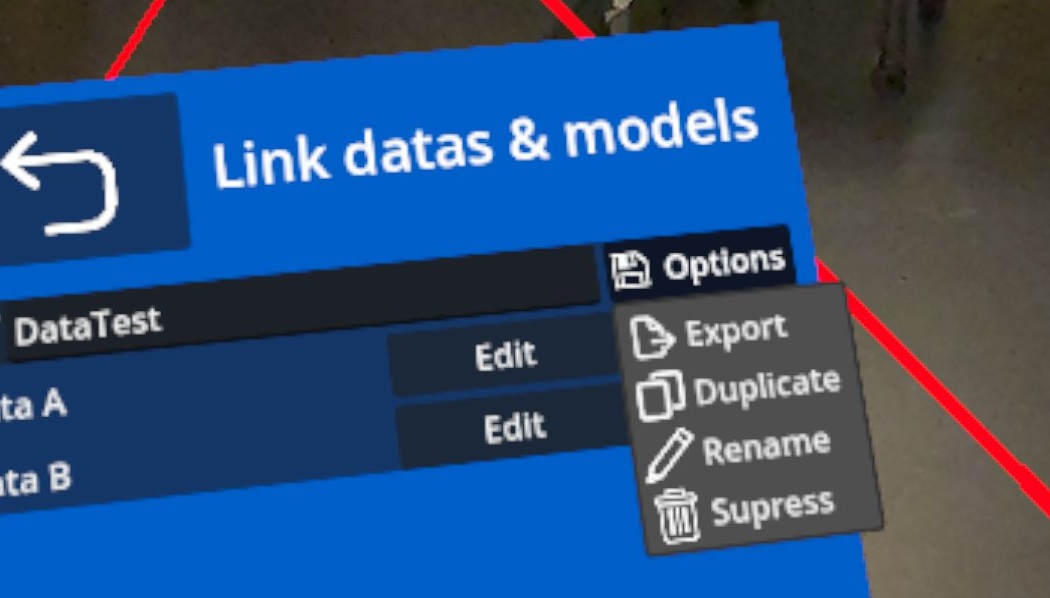
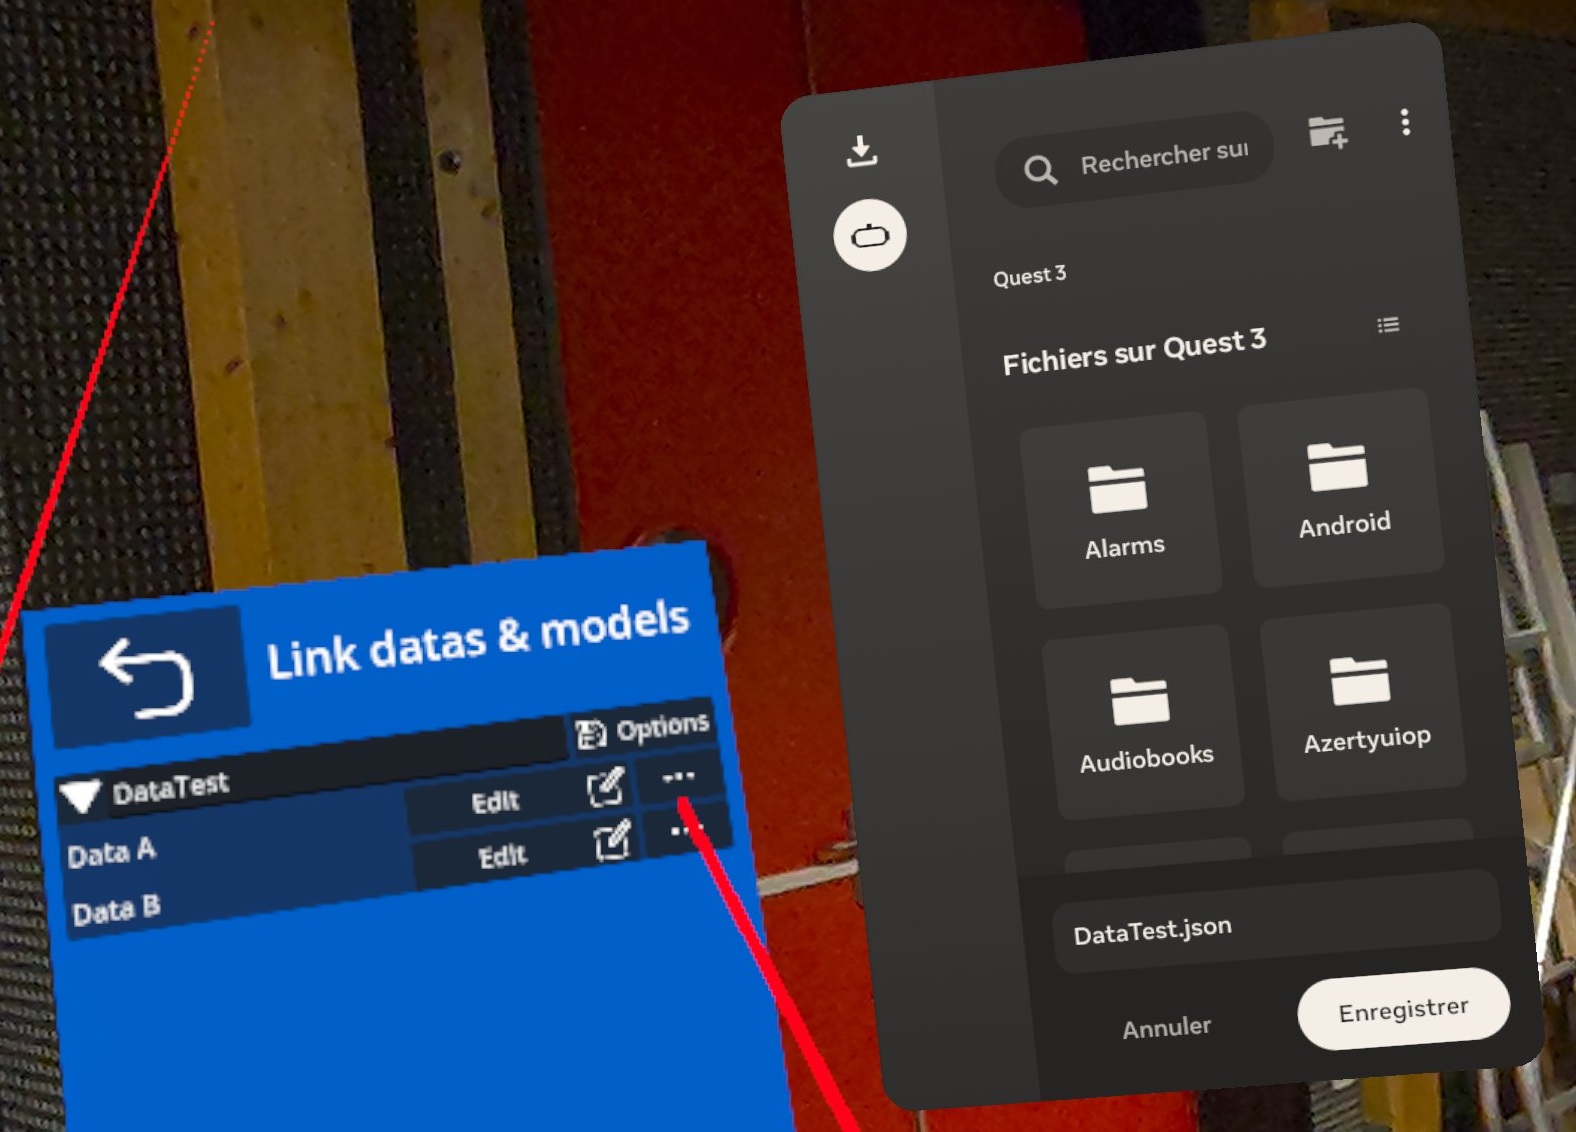
To export your dataset, use the dropdown menu to the right of the dataset name and select “Export”.
The native Meta Quest menu opens, offering you the option to choose where to save your dataset and under what name.
The data is saved as a .json file. You can view and modify this file outside of the application or import it into another headset.
To import a .json file, use the same method as for importing a dataset. Add it via Datasets —> Import data as seen in section 2.1.
Datasets also have the following editing options:
Duplicate
Rename
Delete
Note :
The duplicate, rename, and delete options also exist at the level of each individual data item in the dataset, allowing the user to modify it directly within the application.
The first step is to download/clone the files locally on your machine and open the project in Godot.
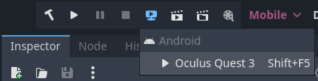
Then plug your headset into your computer; it should be detected by Godot, allowing you to use the “Remote Deploy” option, accessible in the upper right corner of the interface.
Note :
If you see the message “No Remote Deploy export presets configured”.
Go to Project –> Install Android Build Template… –> Install.
Then go to Export –> Add –> Android.
Once your Android export preset is created, check the “Use Gradle Build” box.
In XR Features, switch to “OpenXR”.
You can then apply the following permissions:
Manage Documents
Manage External Storage
Read External Storage
Write External Storage
You can then redeploy the project to your headset using “Remote Deploy”.
Once your project is built, your headset will launch it automatically. Otherwise, you can find it in Application → Unknown Sources under the name “VRAC”.