Tulibee: A Unity-Otree bridge
Tulibee documentation
Summary :
1 - Introduction :
1.1 - Context :
The purpose of this document is to describe the functionality of the Unity - Otree bridge we have created. This bridge enables data exchange between an Otree server and projects running on Unity. The objective is to enable the implementation of multiplayer experiences in Unity thanks to the database of a server.
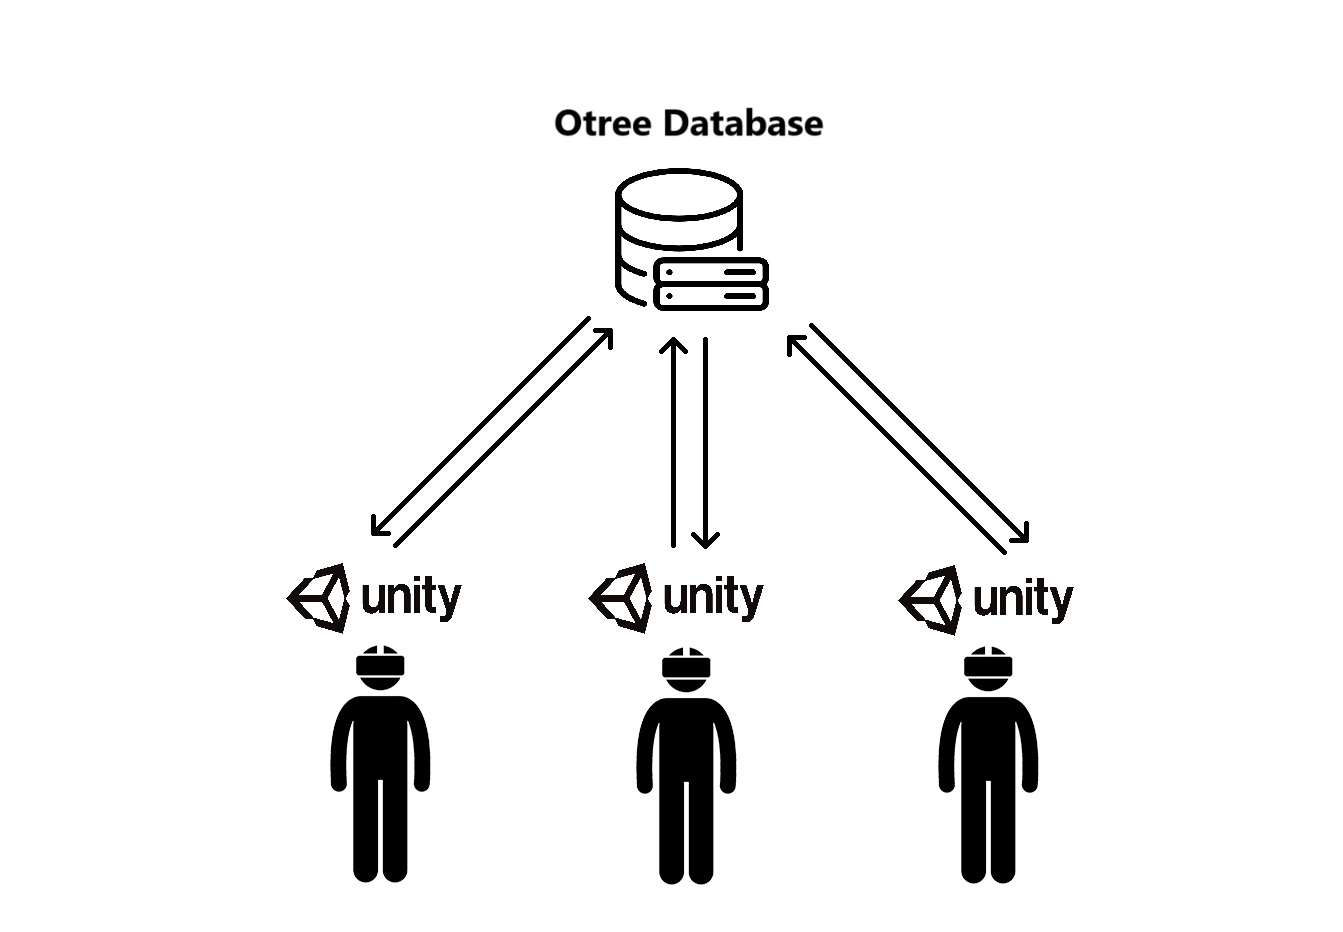
The document describes the functionality of this tool through a multiplayer VR game serving as a proof of concept. First, we will see how to install this project and use the bridge. Then, we will explore how the bridge works from a technical perspective and how it can be extended to your own projects.
1.2 - Otree :
Otree is a Python framework used in various fields related to data management, such as behavioral experiments, surveys, economics, and even video game development. Connected to a server, it enables the implementation of multiplayer experiences.
To create an Otree project, you have two options: either through Python programming or via https://www.otreehub.com/ and its Otree Studio tool. The second allows you to create a project without the need for programming. In our example, we used Otree Studio to create the project “zzv-new_project.”.
1.3 - Unity :
Unity is a game engine, a software capable of managing geometry and physics within a given environment to provide a real-time simulator. Although primarily used in video game development, it is also employed in other fields such as the creation of scientific experiments.
1.4 - Fishing game :
The objective of this project is to develop a multiplayer fishing game that serves as a proof of concept for the use of our bridge. Indeed, game data such as participant IDs, the number of fish caught, and the number of fish remaining in the pond are transmitted from the Unity application to the Otree server.
The rules of the game are as follows:
It is a multiplayer game where each player wears a headset (Meta Quest 3), allowing them to observe fish swimming in a pond in augmented reality. Players can catch fish by aiming them with their controllers. Meanwhile, the fish population in the pond increases regularly, depending on the current number of fish present.
If the number of fish drops below 2, population growth stops, while the maximum number of fish in the pond is limited to 30. This creates a common-pool resource experiment designed to study player behavior in this type of scenario.
The game’s control scheme is as follows:
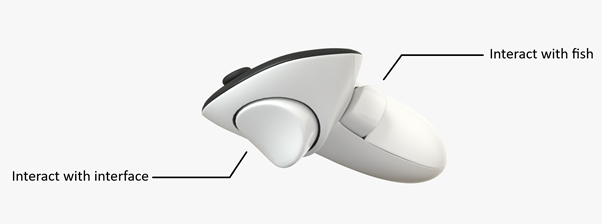
To catch a fish, a player must aim it with their controller until it falls in their action zone, then press the trigger. Between each attempt, the player must wait 1.5 seconds. This cooldown is visually represented by the circle of the action zone gradually refilling.
It is also possible to catch multiple fish at the same time.
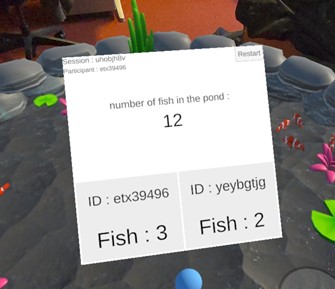
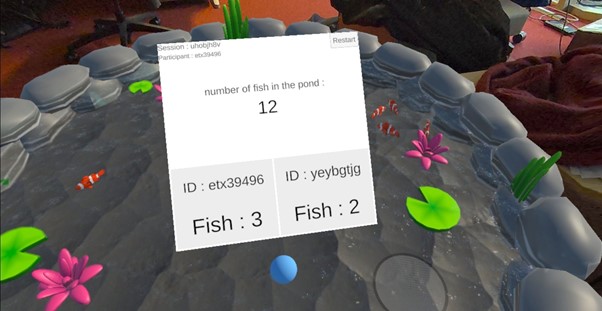
Players can check the number of fish caught and the remaining fish in the pond on the panel displayed in the scene.
The game continues until the are no fish in the pound or the players stop playing.
Now that the gameplay has been explained, the following section describes the steps to install the game and create your own sessions.
2 - Installation :
2.1 - OtreeCore :
All the files required to install the bridge and use the fishing game are available on this GitLab: https://gitlab.inria.fr/acorn/unityotree_cpr_fishgame

-
CPR_FishGame_OtreeProject: This is the Otree project, where you can find the different session parameters as well as participant details (ID, number of fish, etc.).
-
CPR_FishGame_UnityProject: The game developed in Unity. It contains the graphical part of the project (augmented reality, physics, etc.) as well as the game logic.
-
OtreeCore/otree-core-master: The open-source code of Otree. It runs the Otree project and allows Unity to access session and participant variables from the Otree project.
The first step is to download/clone the files locally onto your machine, then install otree-core-master.
The OtreeCore/otree-core-master folder contains a modified version of Otree. It is an open-source version of Otree that has been altered to include additional functions necessary for the Otree-Unity bridge. This installation is required even if you are already using another version of Otree.
To install Otree, open your command prompt, navigate to the otree-core-master folder, and enter the command “pip install -e .”. This command will start the installation at the location where your folder is stored.
You can type “cmd” in the address bar of the folder to open the command prompt directly in that folder (see the following GIF).
Once the command is entered, you can verify that Otree is installed correctly by using it to run the Otree project locally. To do this, open your command prompt in the zzv-new_project folder and type “otree devserver”.
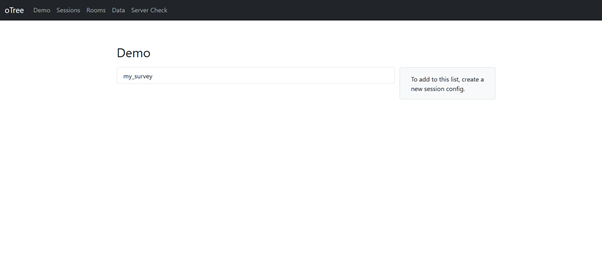
If you don’t receive any error messages, the installation is successful. You can then open your browser, go to the following address: http://localhost:8000, and you should see this interface:
This is a local version to test the installation of OtreeCore. In order for your project to be accessible by other machines (such as the Meta Quest 3), it is necessary to deploy it on a server.
2.2 - Server deployment :
Deploying on a server allows your Otree project to be accessible from any machine via the server’s URL. This way, Meta Quest 3 headsets can connect to the server and exchange data with the Otree project.
For this, the solution we use is the deployment of an Ubuntu Linux server with PostgreSQL as the database management system. This method is detailed in the Otree documentation: https://otree.readthedocs.io/en/latest/server/ubuntu.html.
Additionally, Otree also offers the Heroku solution. This is a platform that allows developers to create applications entirely in the cloud. Heroku manages the web server as well as the databases. The following documentation explains how to deploy your Otree project on Heroku: https://otree.readthedocs.io/en/latest/server/heroku.html#heroku.
2.3 - Unity Project :
Once the Otree server is deployed, you need to install the Unity project on your Meta Quest headsets.
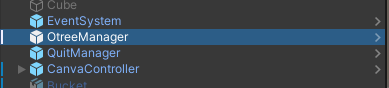
Open the Unity project and go to the “MetaQuestVersion” scene. In this scene, there is an object called OtreeManager, which contains a script called OtreeManager.cs.
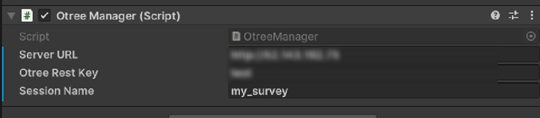
In the Inspector on the right, enter the following information regarding your server:
- The server’s URL address
- Its security key
- The name of the session type you plan to use (if you leave this option blank, the game will present all available sessions on your server).
Connect your Meta Quest to your PC, open the Unity project, and go to File → Build Settings. Select your headset in the Run Device section and start a build by clicking Build And Run.
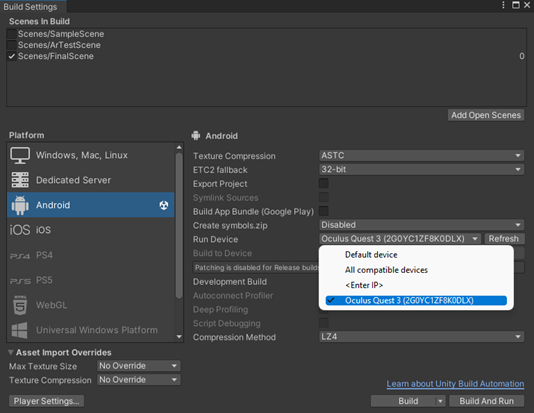
If your headset doesn’t appear, try the following solutions:
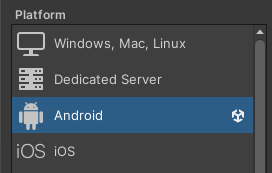
- Ensure that the selected platform is set to Android.
- Make sure your headset is in developer mode and allows USB debugging. If not, please refer to the following guide: https://developers.meta.com/horizon/documentation/native/android/mobile-device-setup/
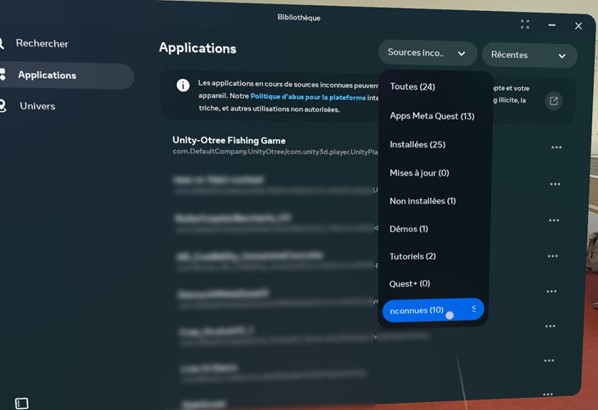
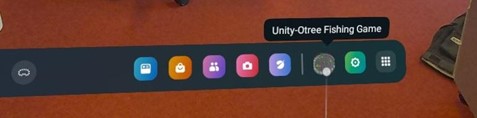
Once your project is built on your headset, it should launch automatically. If not, you can find it under Applications → Unknown Sources with the name “Unity-Otree Fishing Game”.
If you want to directly test the connection to Otree in the editor, you can use the “DesktopVersion” scene. This scene only displays the game’s interface and offers a button to catch a fish. It can also be used if you prefer to build the project on your computer rather than on a headset.
2.4 - Using the bridge :
This section describe the steps about how to use the bridge through the example of the Fishing Game.
The first step is to create a new Otree session. To do this, open your browser and go to the URL of your Otree server. On this page, several options will be available:

- Demo : Launch a demo version of your experiment.
- Session : Manage sessions for your experiment. Unlike a demo, a session preserves its state and data over time, even during server interruptions.
- Room : Manage the rooms for your experiment. A room is used to host participants before they are assigned to different sessions.
- Data : View and download the data from your experiment.
- Server Check : Check the status of your server.
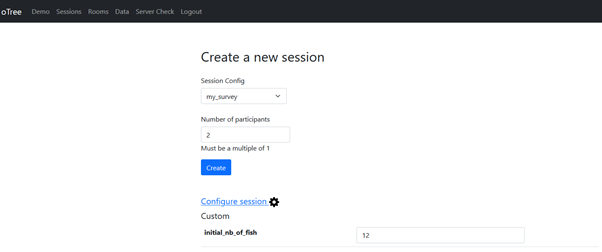
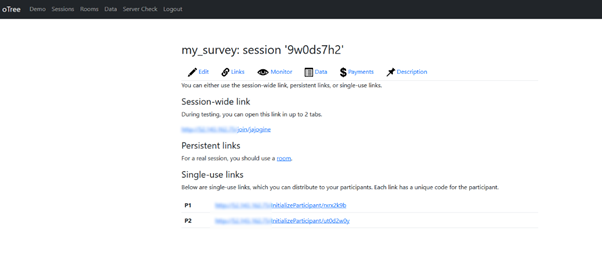
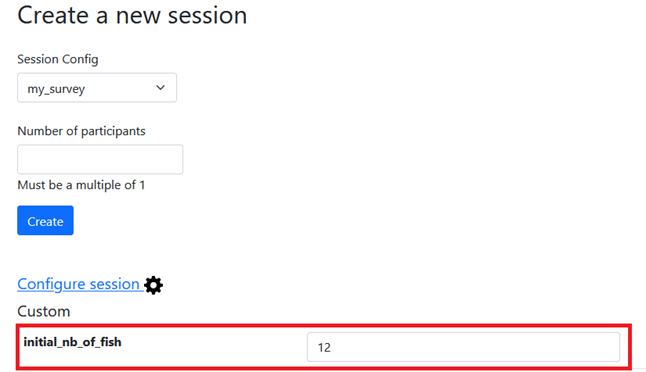
In the case of our example, we only need to create a session and keep the server running during the experiment. So, go to the Session tab. Create your session by selecting the “create new session” option, choose the configuration related to your Otree project (in our case, “my_survey”), and specify the number of participants for this session. In our example, we selected 2 players, but you can set the number of participants as needed. Note that you will need one Meta Quest headset per player for the rest of the experiment.
You can also, under “Configure session”, specify the number of fish you want in the pond at the beginning of the experiment (the default is 12).
Once your session is created, you will have access to its session ID, which in our case is 9w0ds7h2. Make sure to note it down, as it will be needed to join your session at the start of the game.
At this point, you no longer need your computer; the rest of the process will take place exclusively in the game on your Meta Quest.
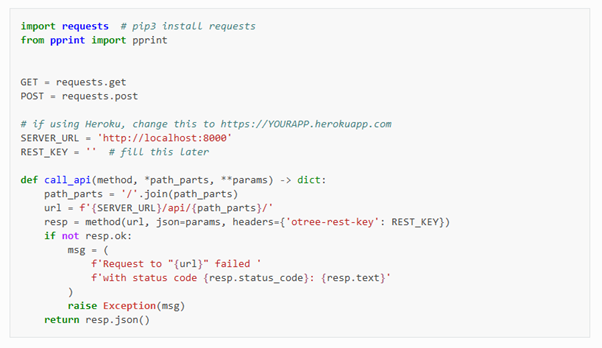
For each participant, launch an instance of the game on a Meta Quest. Once the game starts, you will be in an augmented reality scene with a 3D pond. At the center of this pond, there is a control panel. This panel will allow you to join the Otree session that was previously created.
First, enter the address of your server in the text bar and click on the arrow icon. (If you have correctly entered the server address in the OtreeManager settings, it should display by default.)
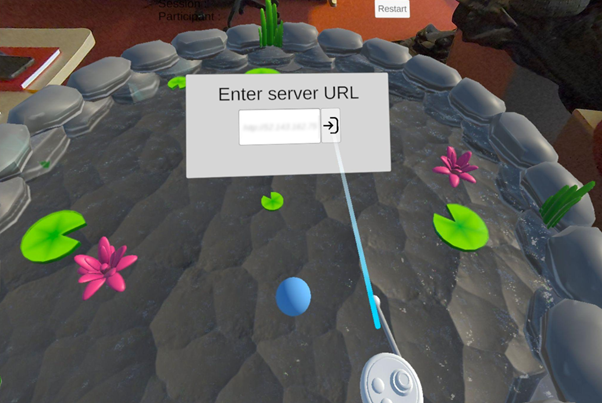
If the address is valid, you will be directed to a new window. Your Unity application is now connected to your Otree server.
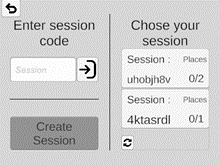
The next step is to join a session. There are two options available, Enter the session code generated earlier (in this example, 9w0ds7h2) or find your session in the list on the right using the same code.
You can then click on the arrow icon in the first case, or directly select the session in the second case.
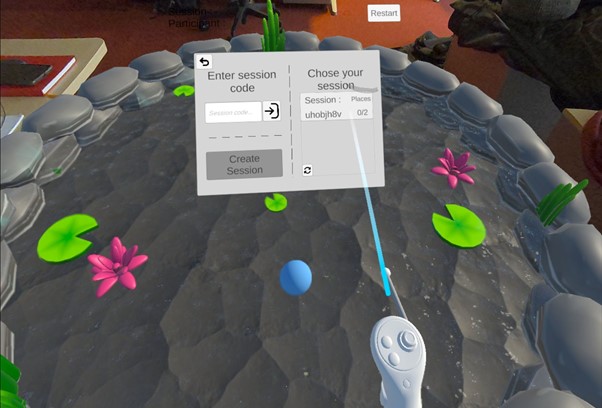
Now, you will see a waiting screen showing the current number of participants and the number of participants needed.
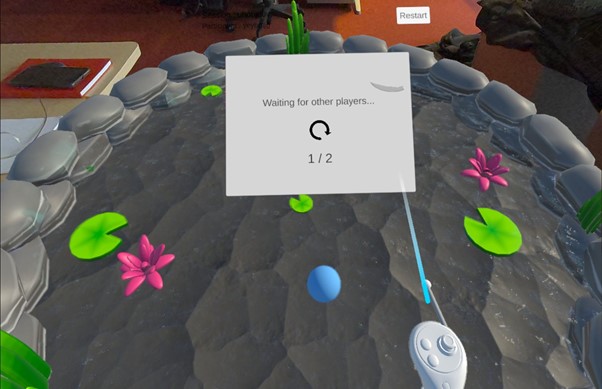
To proceed to the next step, repeat the same process on your second Meta Quest (or more if you specified more participants when creating your session).
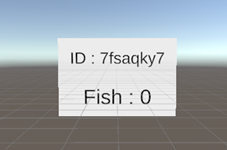
Once both players are connected, the game begins. Fish will appear in the pond, and each of you can catch as many fish as you want, following the rules explained earlier. The number of fish caught by each player, as well as the number of fish still present in the pond, will be displayed on the following interface.
Once the game is finished, the players can exit the application. They will be automatically disconnected from the session.
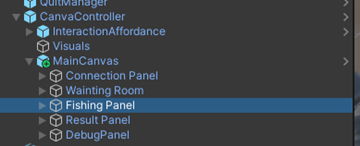
It’s possible to adjust the growth of the fish in the pond before building the project. To do this, in the scene, go to CanvaController → MainCanvas → Fishing Panel.
In the Inspector, under the FishingPanel script, you will find two parameters:
- Growth Rate : he growth rate of the fish population.
- Growth Delay : The time interval between each growth cycle.
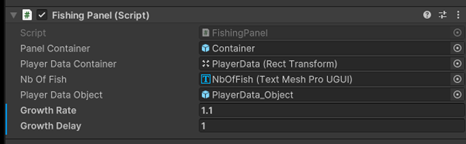
In our case, the fish population is multiplied by 1.1 every 1 second.
2.5 - Get acces to data :
To view the results of the game, go to your Otree server and enter the following URL: : “http://yourServerAdress/ExportSessionWide/SessionIdentifier”.
Don’t forget to specify the address of your server and the session ID you wish to view (in our case, uhobjh8v).
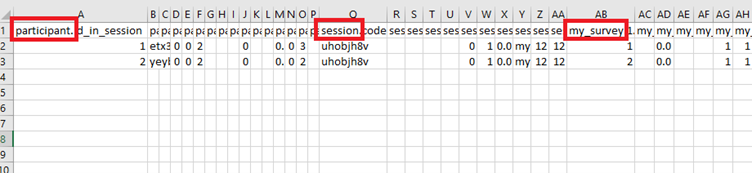
You will then receive a .csv file containing all the data for the session and its participants.

For better readability, you can separate the data into columns using commas. For example, in Excel with the following steps: Select the first column → Data → Convert → Delimited → Next → Finish.
We can observe two sets of data, one for each participant. The most important data here are the followin.
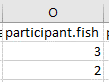
For the participants:
- The participant code, to identify them.
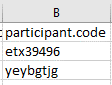
- The number of fish caught.
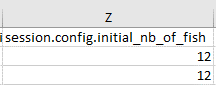
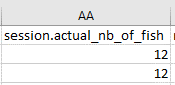
For the session: (the two rows will have the same information, as both participants are in the same session)
- The session code.

- The initial number of fish in the pond (the one entered when creating the session).
- The current number of fish in the pond.
We thus have access to all the data related to our fishing game for each participant. If you want to add new data to create your own experience, this is explained in the following section dedicated to how the Unity-Otree bridge works.
3 - How the bridge works :
This section explains how the bridge works and how to create your own Otree-Unity experience by using it.
3.1 - Custom Otree Settings :
As mentioned earlier, the bridge allows Unity to access Otree session parameters, read them, and modify them. However, this is only possible for certain types of parameters.
Indeed, if you look at the data obtained at the end of the experience in the .csv file, you will notice that they are sorted by their name. First, you have the “participant” data, then the “session” data, and finally the “my_survey” data (with my_survey being the name of the Otree project used in this example).
The participant and session variables can be read and edited. However, the project variables (my_survey) can only be read.
To communicate between Unity and Otree, we therefore use only the first two types of variables.
To create a new variable, this is done in the Otree project in the settings.py file.
unityotree_cpr_fishgame\CPR_FishGame_OtreeProject\zzv-new_project\settings.py
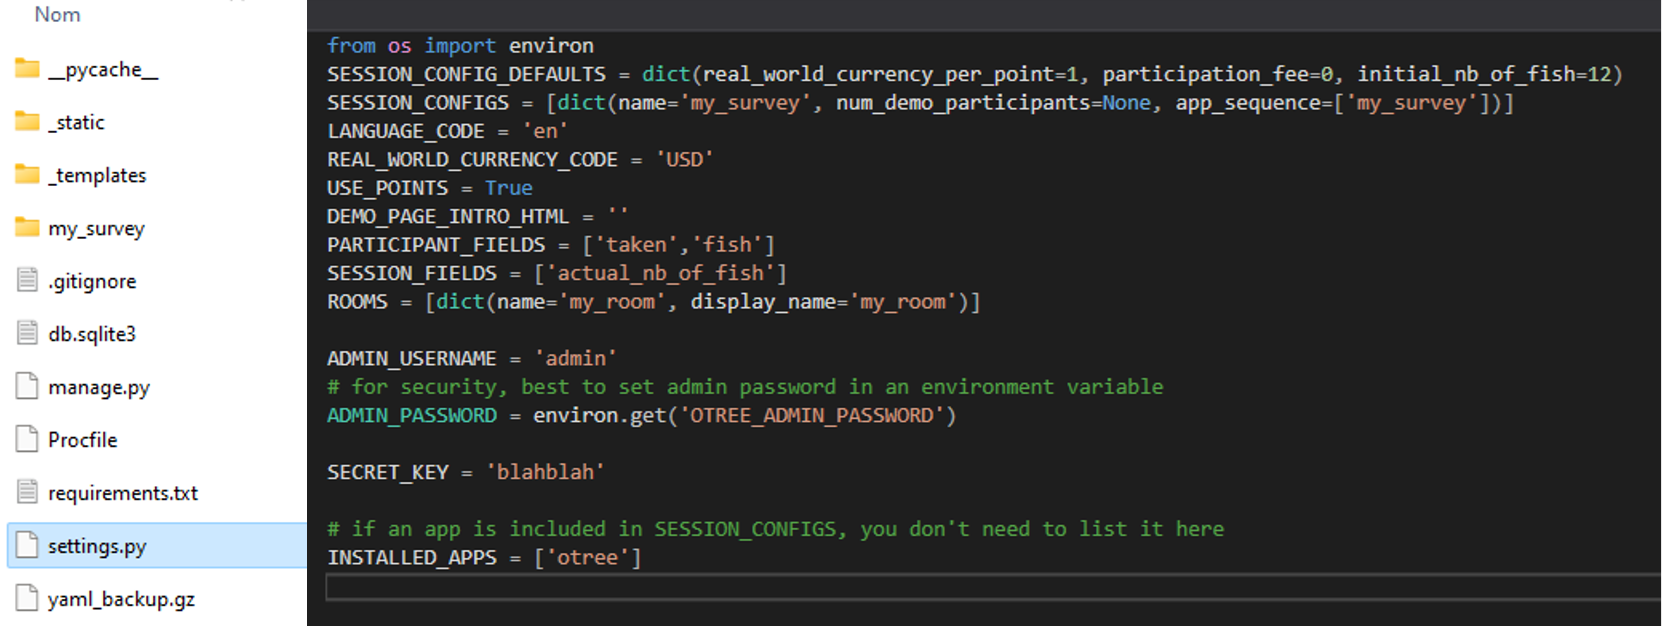
This file contains various project parameters. The ones that interest us here are the following:
-
SESSION_CONFIG_DEFAULTS
The list of session variables accessible when creating a new session. Here, you will find the variable “initial_nb_of_fish=12”, which specifies the number of fish desired at the start of a game. This is an int (integer) variable. The value displayed here is the default value, but it can be changed when creating a session.
-
SESSION_FIELDS
The list of other session variables. These do not have default values. Among them, you will find the “actual_nb_of_fish” variable, which indicates the number of fish in the pond. These are string variables.
-
PARTICIPANT_FIELDS
The list of participant variables. These are the data specific to each participant in the session. They also do not have default values and are also strings. Among them, you will find the “fish” variable, which indicates the number of fish caught by the participant, as well as the “taken” variable, which will be explained in section 3.3.
To add a new variable, you must insert it into the list following the previous variables and then restart your server.
The SESSION_FIELDS and PARTICIPANT_FIELDS variables are not accessible via an interface, unlike those in SESSION_CONFIG_DEFAULTS. The following section explains how to access these variables and use them in your project.
3.2 - REST API Requests :
To exchange data between Otree and Unity, we need an API (Application Programming Interface). This is an interface that allows applications to communicate with each other. In our case, Otree provides its own system through REST API requests. The REST architecture (Representational State Transfer) allows communication between systems using the HTTP with URL addresses, as seen when retrieving data at the end of our game.
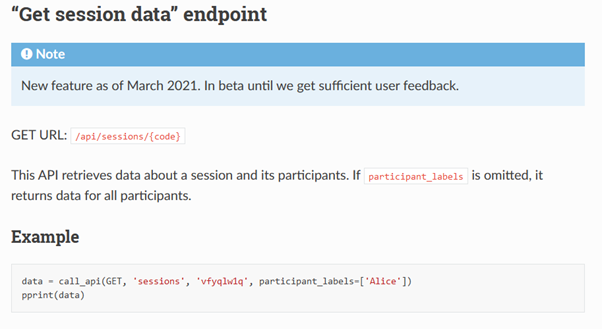
A series of possible requests has been developed by Otree and is referenced in the following documentation: https://otree.readthedocs.io/en/latest/misc/rest_api.html
The requests are divided into two categories: GET and POST. A GET request allows you to retrieve information, while a POST request allows you to modify information. Each request is identified by its endpoint, which is the string of characters after the /api/ component.
For our project, we use, for example, the api/sessions/{code} endpoint to retrieve data related to each session.
However, the requests provided by Otree are not sufficient for our project. Specifically, it is not possible to read all variables, especially participant variables, which can only be modified. Therefore, we have created new requests. This is why it is necessary to install the version of Otree-Core available on GitLab.
Each request is defined by a function accessible in the open-source code. All of these functions are gathered in the rest.py file, which can be found at the following path:
unityotree_cpr_fishgame\OtreeCore\otree-core-master\otree\views\rest.py
These functions are all structured in the following way:
class RESTOTreeVersion(BaseRESTView):
    url_pattern = '/api/otree_version'

    def get(self):
        return JSONResponse(dict(version=otree.__version__))
[rest.py L103-107]
This function allows us to retrieve the version number of Otree. The variable “url_pattern” corresponds to the endpoint that must be entered to access this request. The request is therefore as follows: http://serverAdress/api/otree_version
When referring to a request, it will be named according to its endpoint (in this case, /api/otree_version).
For our project, the requests used and their types are the following:
-
/api/sessions : GET
Allows access to the parameters of each existing session (session ID, number of participants, etc.).
-
/api/session_vars/{code} : POST
Allows modifying the value of a session variable, where the session is identified by its ID.
-
/api/participant_vars/{code} : POST
Allows modifying the value of a participant variable, where the participant is identified by their ID.
Additionally, a new request was created for the project:
-
/api/test/{code} : GET
Allows obtaining all parameters of a session, including the parameters of the participants, the session itself, and the project (see section 4.1).
This set of requests is used by our Unity program to communicate with the server. The method of sending and receiving these requests is explained in the next section.
3.3 - Use of Requests by Unity :
At the beginning of the Otree request documentation, a typical setup is provided for using these requests.
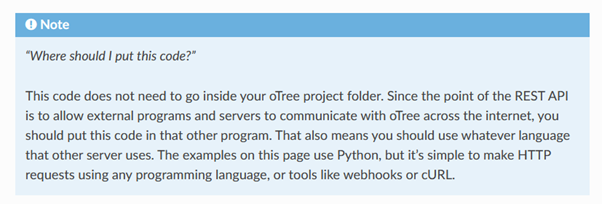
However, this code is written in Python, while Unity uses C#. Therefore, we have created our own functions accessible in the OtreeManager.cs file of our Unity project: unityotree_cpr_fishgame\CPR_FishGame_UnityProject\Assets\Script\OtreeManager.cs
The OtreeManager.cs file is the core of the project, so we will present it in detail. Other scripts frequently reference and rely on it.
Variables :
[SerializeField] public string serverURL;
[OtreeManager.cs L14]
The URL of the server where the Otree project is hosted.
[SerializeField] public string OtreeRestKey;
[OtreeManager.cs L16]
Otree identification key to authorize requests.
[SerializeField] public string sessionName;
[OtreeManager.cs L18]
Filter to find sessions using our Otree configuration on the server.
[SerializeField] public string session;
[OtreeManager.cs L20]
Otree session ID to which the player has connected.
[SerializeField] public string participant;
[OtreeManager.cs L22]
Otree participant ID associated with the player.
[SerializeField] public string sessionDatasList = new List<SessionData>();
[OtreeManager.cs L24]
List of existing SessionDatas. A SessionData is an object containing the following information:
- string code
- int num_participants
- float created_at
- string label
- string config_name
- string session_wide_url
- string admin_url
It is used to store the sessions currently on the server along with their properties.
[SerializeField] public string sessionParameters = new SessionParameters();
[OtreeManager.cs L26]
The current SessionParameters. These are data specific to the gameplay. Unlike SessionData, which holds the global parameters specific to Otree, a SessionParameters contains the following parameters:
- int initialNbOfFish
- float actualNbOfFish
[SerializeField] public string participantInSession = new List<ParticipantData>();
[OtreeManager.cs L28]
The ParticipantData related to each participant in the current session. A ParticipantData contains the following information:
- int id_in_session
- string code
- bool taken
- int nbOfFish
The GetRequest and PostRequest functions
hese are the functions used to communicate with the server and send requests. As their names suggest, the GetRequest function is used to send GET requests, while the PostRequest function sends POST requests.
First, here is the script for GetRequest :
public IEnumerator GetRequest(string url, Action<string> callback)
{
    UnityWebRequest uwr = UnityWebRequest.Get(url);
    uwr.SetRequestHeader("otree-rest-key", OtreeRestKey);
    yield return uwr.SendWebRequest();
    if (uwr.isNetworkError)
    {
        Debug.Log("Error : " + uwr.error);
        callback("Error : " + uwr.error);
    }
    else
    {
        callback(uwr.downloadHandler.text);
    }
}
[OtreeManager.cs L76-90]
The request is sent using UnityWebRequest. This is a Unity class that handles and sends HTTP requests.
Line 78: A new request named “uwr” is declared. This request is a GET type, with the URL of our request passed as a string, as seen in section 3.2.
Line 79: A security key is added, with its name followed by the value of the key.
Line 80: The request is sent using the SendWebRequest method. yield return means that the code will resume only once this action is completed. In the meantime, the function is paused. These functions are Coroutines, which allows them to operate asynchronously. This is because sending and receiving data is not instantaneous and depends on several factors, including network quality. Therefore, it is necessary to be able to delay the next steps until the request is completed.
If the request is successful, the result is then obtained via uwr.downloadHandler.text and stored in a callback.
For example, if we want to use GetRequest to check the version of Otree being used, the code will look as follows:
StartCoroutine(GetRequest("http://**.***.***.**/api/otree_version", result =>
{
    //code effectué seulement une fois la requête finie
    Debug.Log("Otree version : " + result); //résultat
}));
//code effectué directement après l'envois de la requete
The Debug in the example only occurs once the callback of the GetRequest function has been sent (line 84 or 88). This allows us to write code that uses the result of the request. However, the code following our coroutine executes immediately after the coroutine has been triggered. It therefore runs too early to use the result of our request and must serve other purposes.
The PostRequest function is quite similar:
public IEnumerator PostRequest(string url, string content, Action<string> callback)
{
    using UnityWebRequest uwr = UnityWebRequest.Post(url, content, "application/json");
    uwr.SetRequestHeader("otree-rest-key", OtreeRestKey);
    yield return uwr.SendWebRequest();

    if (uwr.result != UnityWebRequest.Result.Success)
    {
        Debug.Log("Error : " + uwr.error);
        callback("Error : " + uwr.error);
    }
    else
    {
        callback(uwr.downloadHandler.text);
    }
}
[OtreeManager.cs L93-108]
The difference is that UnityWebRequest.Post requires two additional parameters. These are the data to modify and its type. In our case, the type will always be “application/json.” Also, the data to modify must be understandable in Python, and the Otree API expects a specific syntax.
This syntax is as follows: : “{"vars": {"YourData": YourValue}}”
So, for example, if we want to set the number of fish in the pond to 99 in the context of our game, the code would be:
StartCoroutine(PostRequest("http://**.***.***.**/api/session_vars/9w0ds7h2/",
                           "{\"vars\": {\"actual_nb_of_fish\": 99}}", result => { }));
It is important to note that actual_nb_of_fish is a session variable, so the endpoint to use is /api/session_vars/{code}.
Other functions:
The other functions in OtreeManagers.cs make use of GetRequest to retrieve data from the server and update the various variables mentioned earlier.
GetSessionList :
public IEnumerator GetSessionList(Action<string> callback){...}
[OtreeManager.cs L111-161]
Use GetRequest with the /api/sessions endpoint to retrieve data related to existing sessions. This data is provided in the following JSON format:
[
    {
        "code": "uhobjh8v",
        "num_participants": 2,
        "created_at": 1731419126,
        "label": "",
        "config_name": "my_survey",
        "session_wide_url": "http://**.***.***.**/join/mefujiho",
        "admin_url": "http://**.***.***.**/SessionStartLinks/uhobjh8y"
    },
    {
        "code": "u3zl7b4y",
        "num_participants": 3,
        "created_at": 1732206079,
        "Label": "",
        "config_name": "my_survey",
        "session_wide_url": "http://**.***.***.**/join/ganoluve",
        "admin_url": "http://**.***.***.**/SessionStartLinks/u3zl7b4y"
    },
    {
        "code": "54f486va",
        "num_participants": 1,
        "created_at": 1732804359,
        "label": "",
        "config_name": "my_survey",
        "session_wide_url": "http://**.***.***.**/join/zuzikoge",
        "admin_url": "http://**.***.***.**/SessionStartLinks/54f486va"
    }
]
The function then parses the data and creates a new SessionData object for each existing session, which it adds to the sessionDatasList mentioned earlier.
GetSessionParticipants :
public IEnumerator GetSessionParticipants(string session, Action<string> callback){...}
[OtreeManager.cs L164-235]
Uses GetRequest with the endpoint /api/test/ to retrieve participant information related to a specific session. This data is in the form of the following JSON file:
participant.id_in_session, participant.code, participant. label, participant._is_bot,[...]
1, awr2gg36,,0,0,2,,,,,,, 0.0,, 99, tbmjrfo7,,,,,,my_survey, 1, 12, 0.0,,1,,0.0,,,1,1
2,xlbg8uri,,0,0,2,,,,,,, 0.0,,,tbmjrfo7,,,,,,my_survey, 1, 12,0.0,,2,,0.0,,,1,1
Datas are separated by participants and further categorized by data type. ParticipantData objects are created from this data and added to the participantInSession list. Note that if a ParticipantData object with the same identifier already exists in the list, it is updated instead of creating a new entry.
A particular case for this function, unlike the previous one, is the handling of certain variables. Indeed, this is where we process the custom variables “fish” and “taken”, which were introduced in section 3.1.
As previously explained, the variable “fish” represents the number of fish caught by the player. While it is a string on the Otree side, we want to associate it with the nbOfFish parameter of the ParticipantData object, which is an int. The conversion from string to int can be performed using methods such as int.Parse(“yourStringValue”).
However, as previously explained, custom variables do not have default values. This means that unless the variable has been modified through a POST request, it remains empty. Therefore, a condition has been added to verify the state of the variable:
- If the variable is empty, it indicates that no fish have been caught by the player yet, and thus nbOfFish = 0.
- If the variable contains data, it represents the number of fish caught, and the conversion from string to int can be performed.
if(splitedLabels[j].Contains("participant.fish"))
{
    if (splitedParticipant[j] == null
        || splitedParticipant[j] == "null"
        || splitedParticipant[j] == "")
    {
        participant.nbOfFish = 0;
    }
    else
    {
        participant.nbOfFish = int.Parse(splitedParticipant[j]);
    }
}
[OtreeManager.cs L207-217]
The “taken” variable follows the same rule, except that we want to associate it with a boolean. The rule is as follows:
- If the variable is empty, then taken = false.
- If the variable contains data, then taken = true.
if (splitedLabels[j].Contains("participant.taken"))
{
    if (splitedParticipant[j] == null
        || splitedParticipant[j] == "null"
        || splitedParticipant[j] == ""
        || splitedParticipant[j] == "0")
    {
        participant.taken = false;
    }
    else
    {
        participant.taken = true;
    }
}
[OtreeManager.cs L195-206]
The taken variable is used during player connection and disconnection. Therefore, it is not a gameplay element like the number of fish in the pond or the fish caught by the players. This is why it has not been introduced yet. It will be explained in detail in section 4.1.
GetSessionParameters :
public IEnumerator GetSessionParameters(string session, Action<string> callback){...}
[OtreeManager.cs L238-280]
Use GetRequest with the endpoint /api/test/ to retrieve the custom session parameters related to the session. This involves the same JSON file as before, but this time the variables “initial_nb_of_fish” and “actual_nb_of_fish” are being targeted. For “initial_nb_of_fish”, as explained in section 3.1, this variable has a default value. Therefore, there are no special cases for handling it. However, this is not true for “actual_nb_of_fish”. The logic for this variable is as follows:
- If the variable is empty, it indicates the start of the game, and its value is assigned to match initial_nb_of_fish.
- If the variable contains data, then that value is retrieved.
if (splitedLabel[i].Contains("initial_nb_of_fish"))
{
    sessionParameters.initialNbOfFish = int.Parse(splitedParticipant[i]);
}
if (splitedLabel[i].Contains("actual_nb_of_fish"))
{
    if (splitedParticipant[i] == "")
    {
        sessionParameters.actualNbOfFish = sessionParameters.initialNbOfFish;
    }
    else
    {
        string normalizedValue = splitedParticipant[i].Replace('.',',');
        sessionParameters.actualNbOfFish = float.Parse(normalizedValue);
    }
}
[OtreeManager.cs L259-275]
Note that the actualNbOfFish parameter is a float rather than an int. This is due to a gameplay element. Indeed, in order to make the number of fish in the pond grow, this value is multiplied over time and can therefore be a decimal number. A new fish only appears when actualNbOfFish passes through an integer value. However, decimal values in the JSON file are represented by periods (.), while decimal numbers in C# are represented by commas (,). Therefore, a conversion using the Replace function must be performed in such situations.
We now have 2 functions for sending requests, 3 additional functions that use these requests to retrieve data, and a series of variables to store and work with this data. The foundation of our bridge is now complete. We can now use these elements to develop the rest of our game.
4 - How the game works :
This section will be divided into the following three subsections:
- The connection
- The disconnection
- The fishing game
The section dedicated to the fishing game explains the development of the gameplay and uses the variables discussed in the previous sections (fish, pond, etc.). It is specific to this proof of concept. However, the connection and disconnection processes can be used in other projects. The player connection/disconnection process is essential regardless of how you use the Unity-Otree bridge.
4.1 - Connection :
The connection of participants to the server is handled through the ConnectionPanel.cs script. It is attached to the ConnectionPanel object in the scene at the following location: CanvaController → MainCanvas → ConnectionPanel and the file can be found in this directory: unityotree_cpr_fishgame\CPR_FishGame_UnityProject\Assets\Script\ConnectionPanel.cs
This script is linked to the different connection panels described in section 2.4.
After the user has entered the URL, they click the button on the right, which triggers the OnServerEnterButton function.
public void OnServerEnterButton()[...]
[ConnectionPanel.cs L49-91]
The function will retrieve the URL address and assign it to the “serverURL” variable in OtreeManager.cs, as seen earlier. From now on, all requests will be made to this address.
To access the variables and functions of OtreeManager.cs, a static variable of type OtreeManager has been created within the same script.
public static OtreeManager instance;
[OtreeManager.cs L11]
void Awake()
{
    instance = this;
}
[OtreeManager.cs L34-37]
All other scripts in the project can therefore call OtreeManager in the following way:
OtreeManager.instance.VariableName
OtreeManager.instance.FunctionName()
This is the case here where the ConnectionPanel.cs script accesses the variable from OtreeManager.cs.
OtreeManager.instance.serverURL = serverURLText.text;
[ConnectionPanel.cs L58]
Once the URL is stored, the GetSessionList method will be used to retrieve the existing sessions from this address.
StartCoroutine(OtreeManager.instance.GetSessionList(onComplete => ...));
[ConnectionPanel.cs L62-90]
Then, our code will use the sessionDatasList, updated by GetSessionList, to consult the session data.
foreach(SessionData session in OtreeManager.instance.sessionDatasList)...
[ConnectionPanel.cs L66-90]
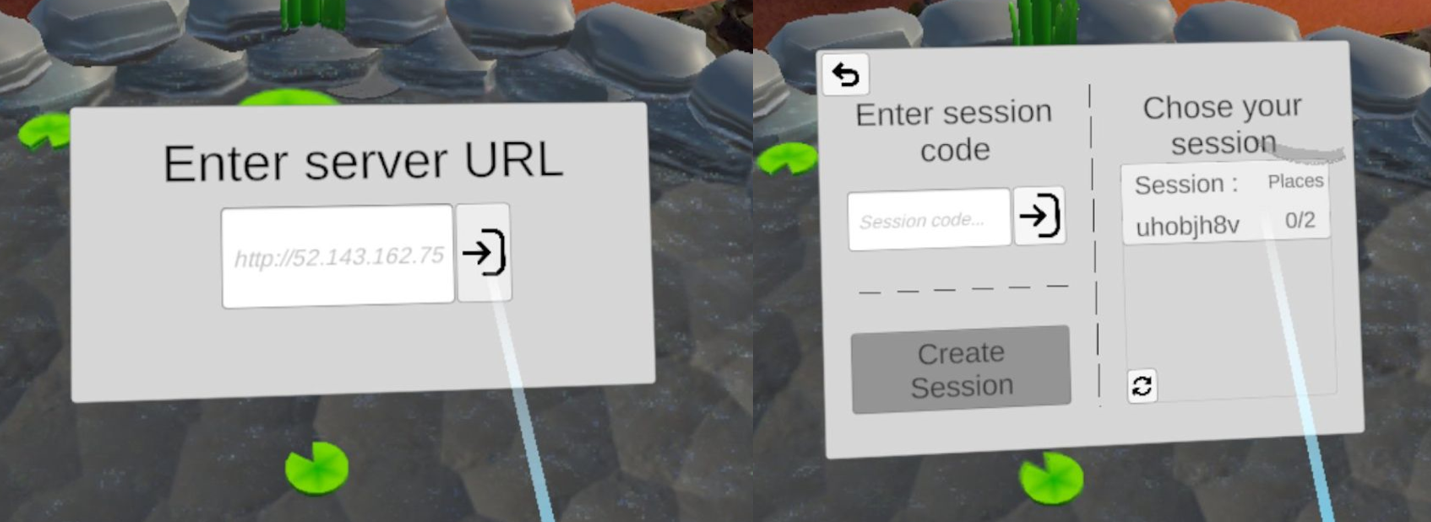
From this list, we will then instantiate SessionButton Prefabs. These are Prefabs with the following appearance:
These are clickable buttons displaying the session name and the number of remaining spots. The goal is to create one for each session. The identifier (e.g., uhobjh8v) is obtained through SessionData.code and the maximum number of participants (e.g., 2) is retrieved from SessionData.num_participants. However, to determine the number of remaining spots, we use the “taken” variable.
The “taken” variable
Unlike the other custom variables introduced earlier, the taken variable does not serve the gameplay. It is used to assign players according to the available participant IDs.
As we have already seen, when creating a session on Otree, a number of participants is defined. For each participant, a set of data specific to them is created. This can be observed when retrieving the data, where each row corresponds to a participant:
One of the objectives of the Otree-Unity bridge is to associate new players on the Unity side with these data sets. To do this, we use the Participant.code data, which is a unique identifier (in the example above, “etx39496” and “yeybgtjg”). Therefore, when a new player connects, they are assigned one of the existing identifiers. This identifier is stored so that when the player takes actions (such as catching a fish, etc.), we can find the corresponding data row on the Otree side and update it.
Each player only modifies their own data row and never the others. The other rows are used for reference purposes only (for example, to display the number of fish caught by other players).
However, how can we ensure that when a new player arrives, we correctly associate them with an aviable data row? This is the purpose of the taken variable. As we saw in the previous section, when retrieving the data, the taken variable follows this rule:
- If the variable is empty, then taken = false.
- If the variable contains data, then taken = true.
So, if “taken = false”, it means the row is not yet associated with another player and can be used. If “taken = true”, then this row is already taken.
Returning to our SessionButton, it is possible to know the number of players already in the session by counting how many ParticipantData have their taken variable set to true.
StartCoroutine(OtreeManager.instance.GetSessionParticipants(session.code, onComplete =>
{
    foreach(ParticipantData participant in OtreeManager.instance.participantInSession)
    {
        if (participant.taken)
        {
            places++;
            sessionButtonInstance.GetComponent<SessionButton>().SetupButtonUI(session.code, places, session.num_participants);
        }
    }
}));
[ConnectionPanel.cs L74-86]
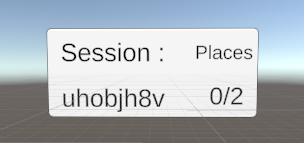
Once our SessionButton is created and updated, we can then click on the one of our choice to join the corresponding session.
Here is an example with two sessions and no players connected (one with 2 participants and the other with 1 participant).
Clicking on one of these buttons triggers the second step of the connection via the OnConnectionButton function.
public void OnConnectionButton(){...}
[ConnectionPanel.cs L122-160]
This function checks if the selected session still exists. Indeed, some time might have passed between the connection to the server and the selection of the session, during which the session might have been deleted. Then, it triggers the AttributeParticipantID function, which, as the name suggests, will assign one of the session’s identifiers to the player.
private void AttributeParticipantID(){...}
[ConnectionPanel.cs L176-202]
The function first checks the taken variables of the participants in the session. If none are available, the function returns an error message and stops. Otherwise, it retrieves the last ParticipantData with a taken variable set to false.
for (int i = 0; i < OtreeManager.instance.participantInSession.Count; i++)
{
    if (!OtreeManager.instance.participantInSession[i].taken)
    {
        participantAviable = OtreeManager.instance.participantInSession[i];
    }
}
if(participantAviable == null)
{
    ShowErrorPanel("No space available");
}
[ConnectionPanel.cs L179-189]
The function can then make a POST request to update the taken variable on the Otree side for this participant and assign it a value. This way, during future GetSessionParticipants calls, the taken variable for this participant will be set to true, and the corresponding data will not be assigned to another player. After the request callback, the player’s information is updated.
StartCoroutine(OtreeManager.instance.PostRequest(OtreeManager.instance.serverURL
    + "/api/participant_vars/" + participantAviable.code
    + "/", "{\"vars\": {\"taken\": 77}}", onComplete =>
{
    OtreeManager.instance.session = targetSession;
    OtreeManager.instance.participant = participantAviable.code;
    onParametersSet?.Invoke(targetSession, participantAviable.code);
    onConnectionDone?.Invoke();
}));
[ConnectionPanel.cs L193-200]
The connection is now complete. This player is associated with an Otree participant in a specific session on the server.
The next step is to wait for the other participants. This is done via the script WaitingRoomPanel.cs. It is attached to the WaitingRoom object in the scene at the following location: CanvaController → MainCanvas → WaitingRoom. The file can be found in the directory at: unityotree_cpr_fishgame\CPR_FishGame_UnityProject\Assets\Script\WaitingRoomPanel.cs
This script sends a request in a loop to update participant information and stops once all participants are occupied by players. That is, when taken = true for the data of each participant.
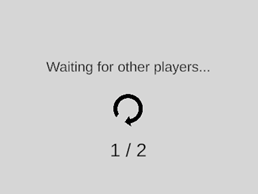
Once the conditions are met, the waiting room panel closes, and the game can begin.
4.2 - Disconnection :
Disconnection is even important as connection. Indeed, it must be possible to disconnect a player if they leave the game, in case another player wants to take their place.
The disconnection process is managed by the script QuitManager.cs. It is attached to the QuitManager object at the base of the scene. The file can be found in the following directory: unityotree_cpr_fishgame\CPR_FishGame_UnityProject\Assets\Script\QuitManager.cs
Within this script is the function QuitFunction. This function send a POST request that will change the value of the taken variable on the Otree side.
StartCoroutine(otreeManager.PostRequest(otreeManager.serverURL + "/api/participant_vars/"
    + otreeManager.participant + "/", "{\"vars\": {\"taken\": 0}}", onComplete =>
{
    allowQuitting = true;
    Application.Quit();
}));
[QuitManager.cs L39-43]
Thus, the data of the Participant corresponding to this taken variable will be freed up and can be associated with another player.
To trigger the QuitFunction at the right time, we use OnApplicationQuit, which is a Unity function that is called when the application is about to close.
void OnApplicationQuit()
{
    QuitFunction();
}
[QuitManager.cs L23-26]
We also use Application.CancelQuit to prevent the application from closing until the request to change the value of taken is complete.
if (!allowQuitting)
{
    Application.CancelQuit();
}
[QuitManager.cs L52-55]
So, when the application is about to close, it is paused to send a request. Once the request is completed, the application can close properly.
In the case of an application on Meta Quest, the OnApplicationQuit function is not sufficient. Indeed, the trigger is not recognized. Therefore, we had to use OnApplicationPause, which is triggered when returning to the Meta Quest menu.
void OnApplicationPause()
{
#if UNITY_ANDROID
    QuitFunction();
#endif
}
[QuitManager.cs L15-20]
For use on a computer, it is triggered when the user clicks outside the application window. To prevent this, we added a condition #if UNITY_ANDROID so that it only takes effect on Android, which is the case for Meta Quest.
So, we now have our connection and disconnection system. The only thing left is the development of the fishing game itself.
4.3 - The Fishing Game :
The scripts related to the fishing gameplay are as follows:
-
FishingPanel.cs : Updates the data on Unity in relation to the data on the Otree server, displays visible information on the in-game panel, and manages the growth of the fish population in the pond (both population growth and fish capture).
-
FishSpawner.cs : Spawns new fish based on data updated by FishingPanel.cs and handles the disappearance of captured fish.
-
MarkerManager.cs : Manages the behavior of the target used to capture fish and its interactions with the fish.
-
FishMovment.cs : Controls the behavior of the fish in the pond.
The evolution of the pond:
When the waiting room is finished and all players are connected, WaitingRoomPanel.cs sends an event that is received by FishingPanel.cs and FishSpawner.cs. Both of these scripts will then spring into action.
The FishingPanel.cs script will set up the various game parameters through the ShowPanel function, which will call the following functions:
public void SetupActualNbOfFish(){...}
[FishingPanel.cs L63-69]
SetupActualNbOfFish is used to synchronize the number of fish currently in the pond on the server side with the number of fish initially set in the session parameters.
public void SetupPlayerNbOfFish(){...}
[FishingPanel.cs L72-81]
SetupPlayersNbOfFish which, for each participant, will instantiate a PlayerDataPrefab. These are interface elements displaying information related to a participant.
public void DataUpdater(){...}
[FishingPanel.cs L155-170]
DataUpdater which will make two requests to update the game with respect to the session parameters and participants on the server side. Once these requests are finished, it will call itself again. The purpose of this function is to continuously update the game data so that it can account for changes made to the server data by other players. By restarting the function only once the previous requests are finished, we avoid overloading the server. Finally, DataUpdater calls the GrowthFishFunction once it has completed the first data update.
public void GrowthFishFunction(){...}

public IEnumerator GrowthFishCoroutine(){...}
[FishingPanel.cs L118-152]
GrowthFishFunction starts the GrowthFishCoroutine, which is in charge of growing the number of fish in the pond and updating this data on the server. However, if all the players start this coroutine, the number of fish will grow even faster, proportional to the number of players (for example, with 3 players, the number of fish will grow 3 times too fast).
The solution is to choose only one player to start this function. To do this, we decide to rely on the participant IDs in the session. Therefore, we perform a check that allows only the first participant in the session to start the coroutine (this choice is arbitrary, any participant could do it as long as they are the only one launching this function).
//check if actual player is the first particpant
foreach (ParticipantData participant in otreeManager.participantInSession)
{
    if(participant.id_in_session == 1 && participant.code == otreeManager.participant)
    {
        StartCoroutine(GrowthFishCoroutine());
    }
}
[FishingPanel.cs L120-127]
The GrowthFishCoroutine function then waits for the specified delay and multiplies the number of fish in the pond by the growth rate, while following these two rules:
- If the number of fish is less than 2, there will be no more population growth.
- If the number of fish exceeds 30, it is capped at 30.
Finally, the function updates the data on the server so that the game iterations of other players can access the new fish count. The function then calls itself again to grow the population at the next interval.
Up to this point, it has been about updating and transforming data (except for the SetupPlayersNbOfFish function). Meanwhile, the FishSpawner.cs script controls the visual aspect:
Similar to FishingPanel.cs, it is triggered upon receiving the event from WaitingRoomPanel.cs, which then launches the StartGraphicVersion function.
public void StartGraphicVersion(){...}
[FishSpawner.cs L61-66]
This function initializes local variables and retrieves OtreeManager for the rest of the process, which then allows the code in the Update function to execute. The Update function compares the actual number of fish in the pond with the target number, based on the value coming from OtreeManager, following this rule:
- If there are too few fish, we instantiate as many fish as needed.
- If there are too many fish, we randomly delete as many fish as necessary. This happens when another participant has caught one or more fish.
The instantiation of new fish is done through the SpawnFishs function.
public void SpawnFishs(int nbToSpawn){...}
[FishSpawner.cs L69-82]
There are 4 possible fish prefabs, one of which is randomly chosen and then instantiated at a random position in the pond with a random orientation. The object from this prefab is then added to the list spawnedFish, which tracks the fish currently in the pond. This process is repeated until the desired number of fish is reached. Additionally, each prefab has a FishMovment.cs script controlling the behavior of the fish once instantiated.
The removal of fish is done through the RemoveFishRandomly function.
public void RemoveFishRandomly(int nbToRemove){...}
[FishSpawner.cs L85-98]
To do this, we randomly pick from the previously presented fish list. Then, we remove the selected fish from the list before deleting it using the Destroy function. This process is repeated until the desired number of fish is reached.
This is the process for the pond’s functionality. Now, let’s look at what happens when a player catches a fish.
The fishing action
To catch a fish, it is necessary to target it with the reticle introduced in section 1.3.
It is associated with Raycast.cs, a script attached to the controller (XR Interaction → XR Origin (XR Rig) → Camera Offset → Right Controller → Raycast). By calculating the collision point between the controller’s ray and the pond’s bottom, this script allows the reticle to follow our movements.
The reticle has the MarkerManager.cs script as well as a CapsuleCollider. The collider allows it to store in a list the fish it comes into contact with. The following rules are then applied:
- When a fish passes over the reticle, it is added to the list via the OnTriggerEnter method.
- When a fish exits the reticle, it is removed from the list via the OnTriggerExit method.
The ActivateOutline function of the FishMovement.cs script is also called, highlighting the catchable fish.
To catch a fish, the trigger must be pressed. This action is detected via the InputToggle function.
private void InputToggle(InputAction.CallbackContext callbackContext){...}
[MarkerManager.cs L46-52]
Which then calls the Catch function.
private void Catch(){...}
[MarkerManager.cs L75-86]
This function checks the list of fishes currently on the target and calls the Catched method of their respective FishMovment.cs scripts. Additionally, the function sends an event received by FishingPanel.cs and calls the TakeSomeFish method.
private void TakeSomeFish(int quantity){...}
[FishingPanel.cs L99-115]
The purpose of this function is to update the number of fish in the pond on the server side, as well as update the number of fish caught by the participant on the server side.
Meanwhile, the Catched function from FishMovment.cs take action.
public void Catched(){...}
[FishingPanel.cs L49-58]
The function makes the associated fish disappear and triggers the score effect visible during a catch.

So, we have the complete process. The state of each player’s pond is updated based on the server data, while each player’s catch updates the data of the corresponding participant on the server. This allows each player to fish in the same pond and observe the actions of others.
1 - Conclusion :
Through this document, we have detailed the entire Tulibee project. Our fishing game proof of concept allowed us to present the operation of this bridge and how to set it up. By using this example as a foundation, it is then possible to extend this bridge to other projects and develop collaborative experiences based on Otree and Unity.